LiveSqueezy
  • Home
  • All Recipes
  • Goal
  • About
  • FAQ
  • Contact

Apple Cider Pulled Chicken

12/13/2021

1 Comment

 
Picture
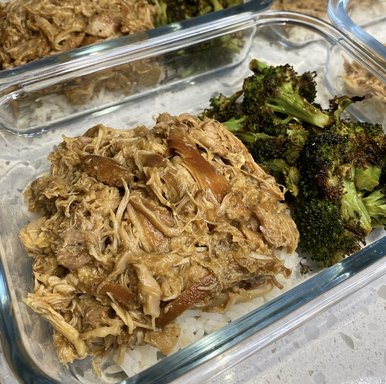
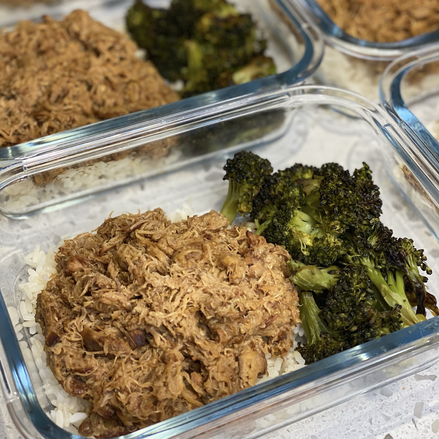
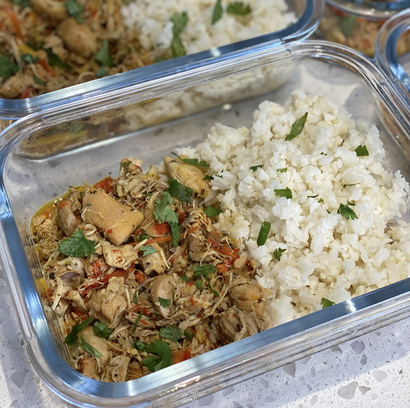
This was so amazing!!! Since there is still fresh Apple Cider in stores I gave this one a go and am SO glad I did. You can make this with chicken thighs or breasts and in the Instant Pot or the slow cooker. I used my Instant Pot and ended up quadrupling the chicken thighs, doubling the onions and apple cider, and used 3 apples, which got me 18 servings. Most people probably don't need that many meals but we eat a lot and also have it twice a day sometimes. Anyways, I share that because I had about 8 cups of leftover sauce once I removed the chicken thighs! I ended up throwing in some arrowroot powder as I simmered and thickened up the sauce until it was down to 4 cups. This chicken turned out delicious and flavorful, so I don't think I'd change a thing. Just expect to simmer down the sauce at the end or have a lot of sauce. This paired really well with simple rice and roasted broccoli. Simple and few ingredients with very little prep and a delicious Whole30 meal. I'll definitely be making this every fall once Apple Cider hits the stores! 

Apple Cider Pulled Chicken
Ingredients:
  • 1.5 lbs boneless skinless chicken thighs, trimmed of extra fat (can use chicken breasts as well)
  • 1 medium yellow onion, sliced
  • 1 crisp apple, peeled and sliced
  • 2 teaspoons minced garlic
  • 1 teaspoon kosher salt
  • 1 cup apple cider, no sugar added
Instant Pot Directions:
  1. Place onion, apple slices, and garlic in the bottom of the Instant Pot.
  2. Place chicken thighs on top of onions and apples.  Sprinkle with salt and pour apple cider over chicken.
  3. Seal lid and cook on Manual setting for 15 minutes.  Allow natural release when cycle is complete.
  4. Shred the chicken right in the pot using forks.  If desired, turn on the Saute function and let the mixture simmer for several minutes to reduce the liquid.
Slow Cooker Directions:
  1. Place onions, apple slices, and garlic in the slow cooker and top with the chicken, salt, and apple cider.  Cook on Low for 6-8 hours or High for 3-4 hours.  Shred chicken.

​Original recipe found here
1 Comment

The Best Smoked Chicken Thighs

9/13/2021

0 Comments

 
Picture
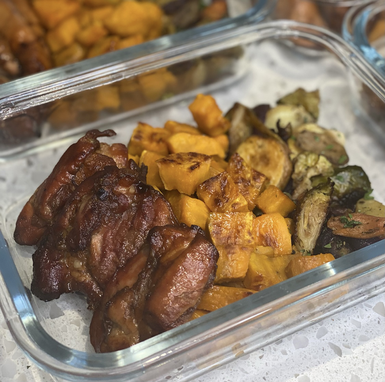
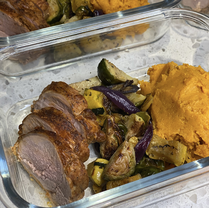
This one lived up to the name and was a delicious Labor Day week meal! Pretty simple and quick marinade to throw together, but just make sure you get it done the day before you want to smoke or grill the chicken. We will definitely be throwing this one into the rotation of chicken meals on the Traeger! We paired this with the easy roasted vegetables that I have posted before and included again below. That is one of my favorite mixed roast vegetable recipes and is so easy to tweak with whatever vegetables you have on hand or prefer. Lately, I've been into the carrot tri-colored chips, red onion, squash, and brussels. To make things even easier you can simply purchase some pre-cut veggies and speed up time spent in the kitchen. This meal was happily devoured all week! 

​The Best Smoked Chicken Thighs
Ingredients:
  • 2 and 1/2 lbs. skinless chicken thighs*
  • 1/4 cup olive oil
  • 1/4 cup balsamic vinegar
  • 3 Tbsp. coconut aminos 
  • 3 Tbsp. water
  • 1 and 1/2 Tbsp. cayenne pepper hot sauce (like Frank’s) 
  • 1 Tbsp. coconut sugar
  • 1 orange, juiced 
  • 1 lime, juiced 
  • 3 garlic cloves, smashed and minced 
  • 2 tsp. salt 
Directions:
  1. Add all of the ingredients to a zip top bag or a bowl with a lid. 
  2. Mix well to make sure the chicken is coated. 
  3. Place in the fridge for 12-24 hours to marinate, the longer the better. 
  4. When you’re ready to smoke, remove the chicken from the fridge and let it come to room temperature in the marinade while you preheat the smoker. 
  5. If you’re using a Traeger or wood pellet smoker, preheat to 450F. I like to sear my chicken before I smoke it for 5 minutes, it gives more flavor. If you’re using a traditional smoker, you can skip this step, you just may need to smoke a bit longer*.
  6. Place the chicken on the smoker/grill directly from the marinade. DO NOT rise or pat dry. Sear the chicken at 450F for 4-5 minutes. Keep the lid closed during the searing. Flip the chicken, close the lid, and adjust the temperature to 225F. 
  7. Let the chicken smoke for 1 and 1/2-2 hours, or until the internal temperature reaches 165F and the juices are running clear. I like to check my chicken at the 1 and 1/2 hour mark because it’s often done. 
  8. Remove it from the smoker, cover with foil, and let it rest for at least 10 minutes before serving. 
Notes:
  • I used boneless chicken thighs, but you can do bone in. I actually always use skinless for this recipe because I always have them on hand, so if you have skin on thighs, just remove it if you want. You may need to add 15 minutes or so to your cook time for bone-in thighs, but it may be even juicer! 
  • If you’re using a standard wood smoker and not a wood pellet grill like Traeger, you can either sear your chicken on the grill over medium-high heat for 5 minutes and then place in the smoker that’s preheated to 225F, or place them directly in the smoker heated to 225F and smoke for 15-30  minutes longer, or until they’re fully cooked. 

Original recipe found here


Easy Roasted Vegetables
Ingredients:
  • 1/4 cup Extra Virgin Olive Oil (you may need a bit more)
  • 3 medium carrots, peeled and cut into 1 - 1-1/2 inch chunks
  • 1/2 pound (about 1-1/2 cups) large Brussels sprouts, outer leaves removed and halved
  • 1 pound (about 4-1/2 cups) baby red potatoes, halved or quartered
  • 1 large red onion, halved and cut into thick 1-inch pieces
  • 1 pound (about 1-1/4 cup) sweet potatoes, peeled and cut into 1 1/2-inch thick slices
  • 3/4 tablespoon dried oregano
  • 3/4 tablespoon dried crushed rosemary
  • 1 teaspoon dried thyme
  • 1 teaspoon dried basil
  • Freshly cracked pepper and sea salt
  • Optional: fresh herbs (such as thyme or parsley) to garnish with
Directions:
  1. Preheat oven to 400 degrees F. Grab a large (11x17-inch) or 2 smaller sheet pans and set aside. Prepare the veggies: peel the carrots and cut into large chunks (if they are thick do 1 inch chunks if they are thinner do 1-1/2 inch chunks), remove the outer leaves of the brussels and halve them, halve the baby red potatoes (quarter especially large ones), halve the red onion and cut into thick 1-inch pieces, peel the sweet potato(s) and cut into large 1-1/2 inch chunks/slices.
  2. Place all the prepared vegetables in one even layer (do NOT overlap or you'll steam the veggies instead of roasting them) on the prepared baking sheet(s) and add the oregano, rosemary, thyme, and basil. Add salt and pepper to taste (I add about 1/2 teaspoon sea salt and about 3/4 teaspoon pepper). Add the olive oil and toss well, evenly coating all the vegetables with the seasonings and oil. (Add 1-2 more tablespoons of oil if the vegetables seem dry.)
  3. Place on middle rack in oven and bake for 35 to 40 minutes, flipping the veggies 20 minutes into baking time.
  4. Remove from the oven and enjoy immediately. 

Original recipe found here
0 Comments

​Instant Pot Peanut Butter Chicken

8/23/2021

0 Comments

 
Picture
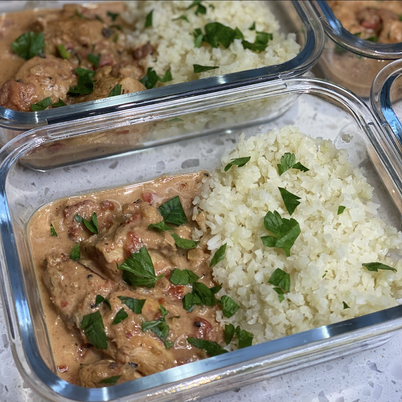
Don't have to twist my arm to try anything with peanut butter! This was delicious and super simple to make in either the Instant Pot or slow cooker. Also, to make this vegan-friendly you can use chickpeas instead. My only note for this recipe is if you coat the chicken in arrowroot flour then I'd opt to brown the chicken on the stovetop instead of the Instant Pot on sauté function. I did a few batches of browning the chicken since I increased the serving size, but my Instant Pot was coated in burnt arrowroot flour by the end and very difficult to clean before I was able to finish cooking. Not sure if I needed a lot more oil or what, but that was something I do not want to mess with again! I used boneless chicken breasts this time and am already planning to try it with chicken thighs next time around. This one was a winner!

​​Instant Pot Peanut Butter Chicken
Ingredients:

Chicken Marinade
  • 1.5 lbs chicken breast or thighs
  • 3 tbsp coconut aminos
  • 2 tbsp arrowroot starch (optional *)
  • Salt to taste
Sauce
  • 1 cup full-fat coconut milk (cream and liquid divided) - 13.5 oz
  • 1 can diced tomatoes (14.5 oz)
  • 1/2 cup unsweetened peanut butter
  • 1 pinch of red pepper flakes
  • 2 - 3 tbsp coconut aminos
  • Additional Salt to taste *
  • 1 clove of garlic (minced)
  • 2 tbsp avocado oil
  • 1/4 cup onion (chopped)​
Directions:
  1. Cut the chicken into cubes. In a big Ziploc bag or medium bowl, marinate the chicken with coconut amino, salt * and arrowroot flour (if using any) for at least 20 minutes. Make sure the chicken is completely coated.
  2. Using "saute" mode, heat up 1 - 2 tbsp oil in an instant pot. Add onion and garlic, saute until fragrant.
  3. Add Chicken cubes (add more oil if needed). Flip a couple of times until the chicken is slightly browned on the outside. Stir in the rest of the ingredients. Use all of the top cream part of the coconut milk (roughly 1/2 cup) along with 1/2 cup of the liquid on the bottom.
  4. Make sure the chicken is evenly coated.
  5. Cover set the valve to “sealing” and cook on high pressure for 10 minutes.
  6. Once done, release. Serve with rice, your favorite vegetables and a sprinkle of fresh cilantro.
Notes
  • *Coconut amino itself is salty, so take that into consideration when you salt the chicken.
  • **If you don't have arrowroot flour, you can omit it. I love using arrowroot flour to help lock the juice in and make the chicken extra moist.
  • For Crockpot and Stovetop Instruction, check out the "What if I don't have an Instant Pot" section in the link below. 
  • You can use 1 to 1 1/2 can of chickpea instead of chicken to make this recipe vegan-friendly.

Original recipe found here
0 Comments

Teriyaki Chicken Stir Fry

5/17/2021

2 Comments

 
Picture
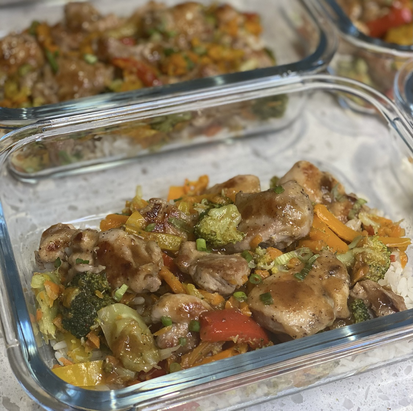
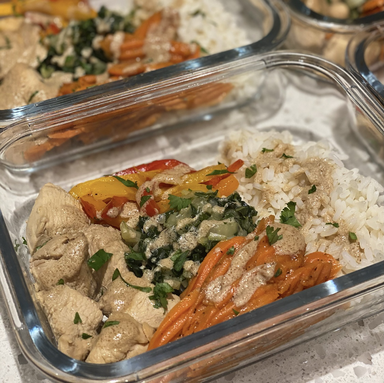
A delicious stir fry recipe from the Paleo Running Momma blog! Having all your ingredients prepped before starting is a must for this one. Purchasing matchstick carrots, pre-cut peppers, and pre-cut broccoli florets can help cut down on kitchen time tremendously. To make the sauce, just throw all your ingredients into a blender and you're done. Last, dice your chicken and coat with salt, pepper, arrowroot or tapioca flour, and coconut aminos. Now you're ready to heat up your skillet or wok and quickly cook a delicious Teriyaki Chicken Stir Fry meal!  I ended up quadrupling the chicken and vegetables, but decided just to triple the sauce, which was a mistake. The sauce amount is a perfect ratio for the meal and will thicken up and reduce once heated up. I worked in 4-5 batches for the chicken and ended up using my Instant Pot on sauté mode to cook all of the vegetables at once. I tend to do that a lot since I typically cook 3-5 times the amount the original recipe calls for. Like all of the Paleo Running Momma recipes I have tried, this one turned out tasty! 

​Teriyaki Chicken Stir Fry
Ingredients:

Sauce:
  • 2 medjool dates pitted or 2 Tbsp raw honey, melted (honey is paleo but not Whole30 compliant*)
  • 1/4 cup very hot water use 2 Tbsp water if not using whole dates
  • 1/4 cup coconut aminos
  • 2 Tbsp rice vinegar or apple cider vinegar
  • 2 tsp sesame oil optional
  • 2 tsp minced garlic
  • 1 tsp fresh grated ginger
  • 1 tsp arrowroot starch or tapioca
Chicken:
  • 1 1/2 lbs boneless skinless chicken thighs sliced into bite size pieces
  • Sea salt and black pepper
  • 2 tsp arrowroot or tapioca flour
  • 1 tbsp coconut aminos
  • 1 Tbsp avocado oil
Veggies:
  • 1 Tbsp avocado oil
  • 1 large bell pepper thinly sliced
  • 1 large or two medium carrots, peeled and cut into matchsticks (juliennned)
  • 3 scallions white and green parts separated, thinly sliced
  • 1 1/2 cups broccoli florets blanched**
Directions:
  1. Have the ingredients prepped before beginning since everything will cook quickly.
  2. Begin by mixing the sauce. If using medjool dates, use a small high speed blender to blend together the dates, water, coconut aminos and rice vinegar. Then stir in the sesame oil, garlic, ginger, and arrowroot. If using date syrup or honey, you can simply whisk the ingredients together in a bowl. Set aside.
  3. Place the chicken pieces on a cutting board or in a large bowl and sprinkle all over with the salt, pepper, and arrowroot, then drizzle with the coconut aminos and toss to coat.
  4. Heat a large non stick skillet or wok over medium high heat and add one tablespoon of the oil. Once sizzling, add the chicken in a single layer and let them cook for a minute or until browned. Stir and cook the chicken for another 2 minutes or until fully cooked and golden brown all over. Remove to a plate and set aside.
  5. Add one tablespoon of oil to cook the veggies and keep the heat on medium high. Add the white scallions, carrots and peppers and cook, stirring often, for 1-2 minutes or until barely fork tender.
  6. Add the blanched broccoli to the skillet followed by the cooked chicken and sauce. Stir to coat the chicken and veggies in the sauce. The sauce should thicken right away, cook another 30 seconds to heat through and combine flavors. Serve hot, over fried cauliflower rice or alone. Enjoy!

Notes:
*You can also sub in 2 Tbsp date paste or date syrup if you prefer. If you’re not using whole dates, use just 2 Tbsp water.
**Blanch the broccoli by steaming, scalding in boiling water, or microwaving. The broccoli should be bright green.

Original recipe found here
2 Comments

Tomato Basil Chicken

4/26/2021

0 Comments

 
Picture
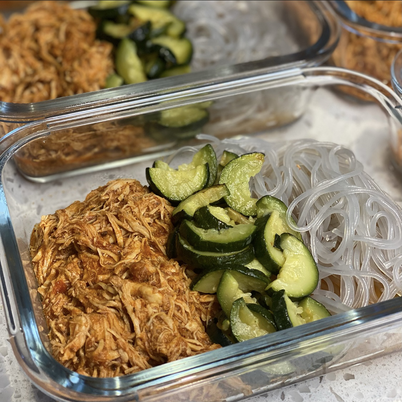
Well this certainly turned out tasting and smelling amazing! Another simple meal prep recipe with little to zero prep, throw all the ingredients into your Instant Pot or slow cooker, and you're pretty much done! I boiled up some sweet potato glass noodles and roasted some zucchini to make this meal complete, and of course to get some more nutrients into the meal. This was definitely a great meal for noodles or zoodles, or better yet a combination of both! We are still keeping things low(er) FODMAP, so I ended up using Extra Virgin Olive Oil Infused with Garlic instead of minced garlic, and swapped the onion powder for Italian seasoning. I don't think either swaps made much of a difference, and like I said this meal was amazing. I will definitely be throwing this one into the meal prep rotation!

Tomato Basil Chicken
Ingredients:
  • 2 pounds boneless, skinless chicken breasts
  • 28 oz can crushed tomatoes with basil
  • 1/2 onion, chopped
  • 2 cloves garlic, minced OR 1 teaspoon garlic powder
  • 1 teaspoon onion powder
  • 1 teaspoon dried basil OR 3 teaspoons fresh, chopped basil (or to taste)
  • 1 teaspoon salt
  • 1 tablespoon balsamic vinegar
  • 1 teaspoon olive oil (optional)
Directions:
Pressure Cooker
  1. Select sauté function on Instant Pot, set to normal
  2. Add a couple teaspoons of extra virgin olive oil or coconut oil to the pot and let it melt
  3. Add chicken breasts, chopped onion, and minced garlic
  4. Brown slightly on both sides
  5. Pour crushed tomatoes over the chicken
  6. Add remaining ingredients and stir a little to combine (doesn't have to be perfect)
  7. Put lid on the IP, make sure vent knob is set to SEALING
  8. Set IP to manual for 20 minutes (add a few more minutes for frozen chicken breasts)
  9. After cooking time has completed, NPR for 10 minutes then QPR to release remaining pressure
  10. Shred the chicken breasts and serve
Slow Cooker
  1. Place chicken breasts in IP or slow cooker
  2. Add remaining ingredients, mixing slightly
  3. Set to slow cook 4 to 6 hours on High
  4. Shred chicken when cooked

​Original recipe found here
0 Comments

Instant Pot Salsa Verde Chicken

4/12/2021

0 Comments

 
Picture
This one got two thumbs up in our house! This was my first time ever making Salsa Verde and it definitely won't be the last. Once the tomatillos are sliced and peppers are de-seeded, throw them in the oven to roast for about 15 minutes, then blend with the remaining ingredients to make the Salsa Verde. All that's left to do from here is fill your Instant Pot or slow cooker with either chicken thighs or breasts and top with your freshly made Salsa Verde sauce. I left the additional chicken broth out of this one and am glad I did because there was plenty of sauce for the chicken. You can easily double the chicken amount with this serving of Salsa Verde. I paired this one with a mix of rice and cilantro lime cauliflower rice and thought this meal was delicious. However, you can easily make this meal to your liking and throw the chicken in a taco or make up a burrito bowl with all your favorite fixings. This recipe was super simple, easy, and tasty, so you know I'll be making it again soon! 

Instant Pot Salsa Verde Chicken
Ingredients:

Tomatillo Salsa Verde
  • 1.5 lbs tomatillos husks removed
  • 1 large poblano pepper de-seeded and sliced in half
  • 2 jalapeno peppers de-seeded and sliced in half
  • 1 tbsp olive oil or avocado oil
  • 2/3 cup diced white onion
  • 1/2 cup fresh cilantro chopped
  • 2 cloves garlic crushed
  • 1 lime juice of
  • 1/2 tsp sea salt + more to taste
For the Chicken
  • 2 lbs chicken thighs or breast
  • 2 tsp cumin
  • 1/2 cup chicken broth
Directions:
  1. Begin by making your tomatillo salsa verde. Preheat your oven to 425 degrees. Slice the tomatillos in half and place cut side down on your baking sheet. Place the peppers cut side down on the same sheet. Lightly brush with oil, and place in the oven. Cook for 12-15 minutes, or until the tops of the veggies are blistered (see photo in post). Remove from the oven.
  2. Place roasted veggies, onion, cilantro, garlic, lime and sea salt in a blender. Pulse and blend for until smooth (don't over pulse). 
  3. Now place the chicken in the bottom of your Instant Pot. Pour the salsa verde on top. Add chicken broth, and cumin. Secure the lid on your Instant Pot, ensuring the valve is turned to the sealed position. Select manual (or pressure for different models), and cook on high pressure for 10 minutes.
  4. Use a quick release and release all steam before opening the lid of your IP. Shred the chicken with a fork and serve, adding additional salt to taste. 
  5. For the slow cooker, place chicken on the bottom of your slow cooker and top with salsa verde. You do not need the chicken broth. Add in some cumin. Cook on low for 4-6 hours, or until the chicken is fork tender.

Original recipe found here
0 Comments

Instant Pot Teriyaki Chicken

4/5/2021

0 Comments

 
Picture
A simple and delicious Instant Pot recipe to save for your collection! This is the kind of recipe that earns its way into the meal prep rotation. I can easily double or triple the ingredients to get enough meals for the week, the ingredients are few and simple with zero prep, and I can dump everything in the Instant Pot and come back later to a pretty much complete meal. For this one I ended up using 100% apple cider since that was the only fresh, no added sugar, apple juice I could find at the store. Maybe in the fall I will be able to find some better apple juice options and compare how it tastes to this apple cider version. I didn't think the Teriyaki Chicken turned out overwhelmingly sweet, which I was a fan of, but also might be due to not using apple juice. Anyways, I almost quadrupled the chicken amount and just doubled the remaining ingredients and thought that ratio provided plenty of sauce. I paired this with some rice and roasted broccoli and really enjoyed this meal all week long! 

​Instant Pot Teriyaki Chicken
Ingredients:
  • 1.5 lbs boneless, skinless chicken thighs
  • 1/2 cup 100% apple juice (no sugar added)
  • 1/3 cup coconut aminos
  • 3 tbsp apple cider vinegar
  • 2 tsp minced ginger (I used 1/4 tsp Ginger Powder)
  • 2 tsp minced garlic
  • 2 tsp sesame oil
  • 1 tbsp honey (substitute 3 pitted and blended medjool dates for Whole30)
  • 2 tsp arrowroot flour dissolved in 1 tbsp water to thicken (optional) 
Directions:
  1. Add all of the ingredients (except for the arrowroot and water) into the instant pot and stir to incorporate the ingredients together, then add in the chicken.
  2. Close the lid, put the valve to sealing and set the instant pot to cook on high pressure for 10 minutes.
  3. Once it’s finished, do a quick release and remove the chicken thighs, transferring to a cutting board.
  4. Add in the arrowroot water mixture and set the instant pot to “sauté”. Stir to mix in the arrowroot and let the sauce come to a simmer to thicken. While it’s thickening, shred the chicken thighs using two forks and add the shredded chicken back into the instant pot.
  5. Press “cancel” once it’s thickened, and serve. Garnish with sesame seeds or chopped green onions.
Notes:
To use dates in place of honey, blend the pitted dates with 3 tbsp very hot water to make a paste, and use that instead.

​Original recipe found here
0 Comments

Paleo Whole30 Garlic Butter Chicken Bites

3/15/2021

0 Comments

 
Picture
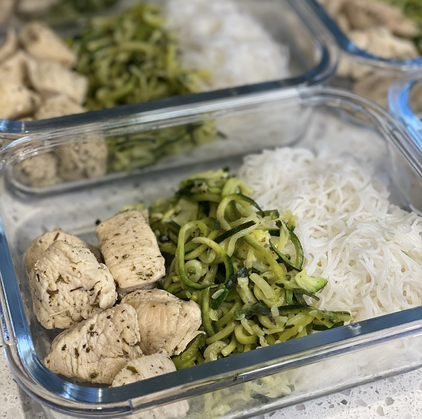
An extremely simple, light, and tasty meal! All made in one pot and the only ingredients are chicken, zucchini noodles, ghee, salt, Italian seasoning, lemon juice, and either garlic or garlic oil. I tripled the recipe below and actually did the chicken in three batches, then dumped a ton of zucchini noodles in a large pot to cook. Paired this with some rice noodles this week since the store was out of my favorite sweet potato glass noodles. There is a ton of flavor in the chicken and zucchini noodles, but not quite enough to cover the serving of rice noodles I added in there. We still really loved this meal though! Just next time would probably toss the added noodles in with the sauce too. This was a quick and tasty recipe to whip up that I will for sure be making again! 

​Paleo Whole30 Garlic Butter Chicken Bites
Ingredients:
  • 2 tablespoons garlic oil
  • 1/4 cup ghee
  • 2 pounds boneless skinless chicken, cut into bite size pieces
  • 2 teaspoons salt
  • 2 teaspoons Italian seasoning
  • 1 lemon juiced
Directions:
  1. Add the garlic oil and ghee to a large skillet and heat to medium/high heat. Add the chicken and sprinkle with salt and Italian seasoning and cook 5-10 minutes, until chicken is cooked through. 
  2. Push the chicken to one side of the pan and add the zucchini noodles. Cook 3-5 minutes, until soft but not mushy. 
  3. Squeeze the lemon over the whole dish, turn off the heat and serve. 
Notes:
  • If you don't need this low FODMAP then use all ghee and 2-3 garlic cloves, minced 
  • You can use butter flavored coconut oil if you don't tolerate ghee

Original recipe found here
0 Comments

Instant Pot Coconut Curry Chicken

2/22/2021

0 Comments

 
Picture
This one might very well be our new favorite curry chicken recipe! It was a little different then other recipes I've posted as it calls for chicken thighs and for browning the chicken before cooking. The recipe serving size is only for 4, so I had to significantly increase ingredients to get enough meals for the week. In doing so, I aired on the side of caution and increased the Instant Pot cooking time to 15 minutes, however that was too much as my peppers were overcooked. A couple other notes I had were that I might drain some excess chicken broth before adding in the spices, and I might use another can of coconut milk next time. Since I increased the ingredients so much I was not about to add 6 cans of coconut milk, but I'd say a good ratio in most recipes I've made is using 1 can of coconut milk per 8 servings. I know that doesn't go in line with what this recipe calls for, but that's just what I've found to work best after years of making recipes that call for canned coconut milk. You can also opt for doing a mix of full fat and low fat canned coconut milk, however that full fat always provides more flavor. A lot of notes on this one, but this meal still seriously turned out amazing and we devoured it all week long with a rice and cauliflower rice mix! I also threw it over roast sweet potatoes later in the week and really enjoyed that combo too. We will definitely be making this one again and again!

​​Instant Pot Coconut Curry Chicken
Ingredients:
  • 1 Tablespoon Olive oil
  • 1 small yellow onion, diced
  • 1 small Red bell pepper, thinly sliced into strips
  • 1 1/2 Pounds boneless, skinless chicken thighs, cut into 1-1/2 inch pieces
  • 4 Cloves garlic, minced
  • 1 Tablespoon Curry powder
  • 1 Tablespoon Dried basil
  • 1 Teaspoon Salt, or to taste
  • 1/2 Teaspoon Chili powder
  • 1/4 Teaspoon White pepper, optional
  • 1/4 Teaspoon Ground ginger, or to taste
  • 1 Can (13.6 ounces) unsweetened full fat coconut milk
  • 1 ½ Tablespoons Arrowroot starch
  • Cooked rice, for serving
  • Chopped fresh cilantro, for garnish
Directions:
  1. Select the “SAUTÉ” function on the Instant Pot and heat up the olive oil.
  2. Add diced onion and prepared peppers to the hot oil; cook for 2 minutes.
  3. Stir in chicken pieces and garlic.
  4. Season with curry, basil, salt, chili powder, white pepper, and ground ginger.
  5. Cook and stir until chicken is just browned, about 2 minutes.
  6. Add coconut milk to the pot and using a wooden spoon, scrape up the brown bits from the bottom of the pot.
  7. Turn OFF the Instant Pot by selecting CANCEL. Secure the lid and make sure the vent is closed.
  8. Select MANUAL (or PRESSURE COOK) and set to cook for 5 minutes.
  9. When time is up, do a quick release.
  10. When the pin drops, remove the lid.
  11. Carefully remove 1/4 cup of the liquid from the pot and into a small bowl; whisk the arrowroot starch into the liquid until thoroughly combined.
  12. Whisk the arrowroot mixture (slurry) back into the Instant Pot; mix and stir around until incorporated and sauce is thickened.
  13. Serve Coconut Curry Chicken over the rice and garnish with cilantro.

Original recipe found here
0 Comments

Sesame Chicken Buddha Bowl

12/21/2020

0 Comments

 
Picture
Going to end the year with this delicious (low fodmap) meal right here! Only four ingredients to whisk together for the sauce/marinade, the chicken and veggies are cooked on the skillet, and the extra sauce is thickened up in a separate saucepan. The original recipe calls for red bell peppers, bok choy, and bamboo shoots, which we swapped out for carrots. You can easily swap in whatever protein or vegetables you prefer though. The chicken needs to marinate for at least 4 hours, so be sure to plan ahead for that or prep everything the night before. I didn't have rice vinegar so I swapped for white wine vinegar and thought the sauce still turned out great. The original recipe link has ingredient portions for one serving, however I altered them below to what a typical 4-5 serving recipe would look like. Also, instead of splitting the sauce in half I accidentally put all the marinade in with the chicken, so I ended up boiling the entire leftover marinade to make the sauce. Boiling it down for at least 5 minutes destroys any harmful bacteria, or so the internet says. Just throwing that out there in case anyone makes the same mistake or wants to preserve some more of the sauce. Some time saving tips, you can purchase Fody's Korean BBQ Sauce & Marinade to use for the sauce, purchase pre-cooked chicken/protein, and also purchase pre-cut veggies. You can make this Buddha Bowl completely to your preference and are guaranteed a delicious, meal! We will definitely be having this again and again. 
​
Sesame Chicken Buddha Bowl
Ingredients:

For Sauce/Marinade:
  • 1 1/3 cup rice vinegar
  • 1 cup aminos or soy sauce
  • 8 Tbsp toasted sesame oil
  • 4 T pure maple syrup
  • 2-4 tsp tapioca starch (optional, for thickening) 
For the Bowl:
  • 1.5 chicken breast, sliced into bite sized pieces
  • 1 Tbsp olive oil
  • 1 red bell pepper, julienned
  • 4 cup baby Bok choy, sliced
  • 1 1/3 cup sliced bamboo shoots (I used carrots instead)
  • 2 tsp chopped cilantro (Garnish, per bowl)
  • 1/2 tsp black sesame seeds (Garnish, per bowl)
  • ½ to 1 cup cooked rice (Per bowl)
Directions:
  1. Whisk together ingredients for marinade—except tapioca starch— in a small bowl. In a shallow dish, add chicken breast and half of the sauce/marinade. Cover and refrigerate 4-8 hours, or up to 24 hours.
  2. In a small saucepan over low heat, add remaining sauce and heat until steaming, about 3 minutes. Whisk in tapioca starch until thickened, about 1 minute. Remove from heat and pour sauce into a small jar or bowl; refrigerate.
  3. Heat a medium skillet or wok over medium heat. Drain marinade from chicken and discard. Place chicken on skillet and sauté 8-10 minutes or until no longer pink in the thickest part, stirring occasionally. Set chicken aside.
  4. Heat 1 teaspoon olive oil in a medium skillet over medium heat, add bell pepper and bok choy, and season lightly with salt and pepper. Sauté 5-7 minutes or until crisp-tender. Stir in bamboo shoots and 3 Tbsp of the sauce, and cook 2 minutes longer.
  5. Combine vegetables in a serving bowl along with brown rice and chicken. Top with chopped cilantro and sesame seeds. Drizzle with remaining sauce to taste.

Original recipe found here
0 Comments
<<Previous
    Picture

    Erika Copeland

    Sharing the recipes I prepare to help others eat more nutritious food and begin their journey to a healthier life.

    Instagram

    categories

    All
    AIP
    Beef
    Breakfast
    Brussels
    Burgers
    Casserole
    Cauliflower Rice
    Chicken
    Crockpot
    Kombucha
    Low FODMAP
    Meal Prep Tips
    Nutrition Blog
    Pork
    Pressure Cooker
    Quiche
    Sausage
    Shrimp
    Snacks
    Steak
    Sweet Potatoes
    Treats
    Tuna
    Turkey
    Vegan
    Video
    Whole30

    Archives

    December 2021
    November 2021
    September 2021
    August 2021
    July 2021
    June 2021
    May 2021
    April 2021
    March 2021
    February 2021
    January 2021
    December 2020
    November 2020
    September 2020
    August 2020
    July 2020
    June 2020
    May 2020
    April 2020
    March 2020
    February 2020
    January 2020
    December 2019
    November 2019
    October 2019
    September 2019
    August 2019
    July 2019
    June 2019
    May 2019
    April 2019
    March 2019
    February 2019
    January 2019
    December 2018
    November 2018
    October 2018
    September 2018
    August 2018
    July 2018
    June 2018
    May 2018
    April 2018
    March 2018
    February 2018
    January 2018
    December 2017
    November 2017
    October 2017
    September 2017
    August 2017
    July 2017
    June 2017
    May 2017
    April 2017
    March 2017
    February 2017
    January 2017
    December 2016
    November 2016
    October 2016
    September 2016
    August 2016
    July 2016
    June 2016
    May 2016
    April 2016
    March 2016
    February 2016
    January 2016

Powered by Create your own unique website with customizable templates.
  • Home
  • All Recipes
  • Goal
  • About
  • FAQ
  • Contact