LiveSqueezy
  • Home
  • All Recipes
  • Goal
  • About
  • FAQ
  • Contact

Sweet Potato Smoothie

3/1/2021

0 Comments

 
Picture
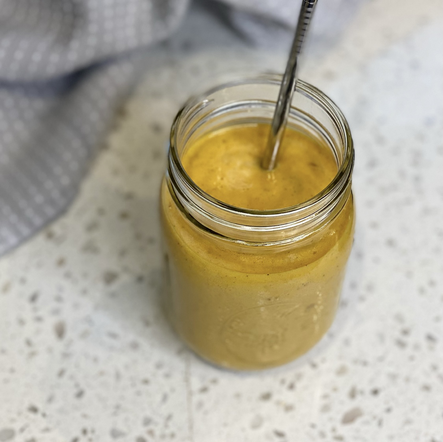
This Sweet Potato Smoothie turned out tasting amazing and just like pumpkin pie! ​I accidentally bought canned sweet potato puree a while ago and finally looked up a fun recipe to put it towards. I froze the remaining sweet potato puree in a 1/2 cup freezer tray and actually enjoyed this smoothie more using the frozen sweet potato. I personally only used 1/2 cup of coconut milk and added a scoop of vanilla protein powder instead of the hemp hearts. It's certainly been a tasty post workout drink or snack, and can easily be a great breakfast option as well. Tastes like pumpkin pie, packed with nutritious ingredients and anti-inflammatory spices, I mean what's not to love? 

Sweet Potato Smoothie
Ingredients:
  • 1/2 cup cooked sweet potato , tightly packed
  • 1 cup coconut milk (or milk of choice)
  • 2 to 3 Medjool dates , pitted
  • 1/2 inch knob of fresh ginger (or 1/4 teaspoon dried ginger)
  • 1/4 teaspoon ground turmeric
  • 1/4 teaspoon ground cinnamon
  • 1 tablespoon hemp hearts (optional, for added protein; or add a scoop of protein powder)
  • ice , as needed to thicken
Directions:
  1. In a blender, combine the sweet potato, milk, 2 dates, ginger, turmeric, cinnamon, and hemp hearts, if using. Blend until very smooth.
  2. Taste the mixture, then blend in another date if more sweetness is desired. Once smooth, add in a heaping cup of ice cubes and blend until they are totally broken down. You can add more ice if you'd like a thicker shake, but keep in mind that more ice will dilute the overall flavor.
  3. Serve chilled right away.
Notes:
If you’d prefer to skip the dates, feel free to use any other sweetener you like. I’ve made this smoothie with a frozen banana instead, and with a splash of orange juice, and it’s hard to go wrong. 
​
Original recipe found here
0 Comments

Strawberry Oatmeal Cookies

2/15/2021

0 Comments

 
Picture
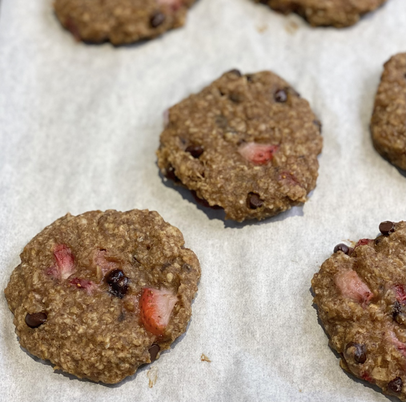
Was looking around for a fun strawberry recipe to make for Valentine's Day and this cookie caught my eye. Only 5 ingredients and basically what I put in my morning bowl of oats (minus the chocolate chips), so I was sold. These Strawberry Oatmeal Cookies turned out so yummy they were devoured days before Valentine's Day even got here. I ended up having to make two batches in one week and we enjoyed them all week long. I used half of the amount of chocolate chips and increased the amount of strawberries some. I also found that dipping my hand in water while forming the cookies was very helpful as it was pretty sticky otherwise. Definitely worth forming into a cookie shape though so it bakes evenly. I have a feeling I will be making these a lot now. I mean you can't get much healthier in a cookie and it was certainly something we looked forward to eating! ​

Strawberry Oatmeal Cookies
Ingredients:
  • 2 cups rolled oats gluten free, if needed
  • 2 large bananas mashed
  • 1/4 cup strawberries chopped
  • 1/2 cup almond butter (can sub for any nut or seed butter of choice)
  • 1/4 cup chocolate chips of choice, optional
Directions:
  1. Preheat the oven to 175C/350F. Line a large tray with parchment paper or prepare a Silpat cookie sheet. Set aside. 
  2. In a large mixing bowl, combine all your ingredients, except for your chocolate chips, and mix well. Fold through your chocolate chips. 
  3. Form 16 small balls of dough and place each one on the lined tray/cookie sheet. Press each ball into a cookie shape. Bake for 12-15 minutes, or until golden on the edges.
  4. Remove from the oven and allow cooling on the tray/sheet before transferring to a wire rack to cool completely. 
Notes:
Store cookies in the refrigerator covered, for up to 1 week. Cookies are freezer friendly and will keep well frozen for up to 1 month.
​
Original recipe found here
0 Comments

Cherry Crisp

5/4/2020

0 Comments

 
Picture
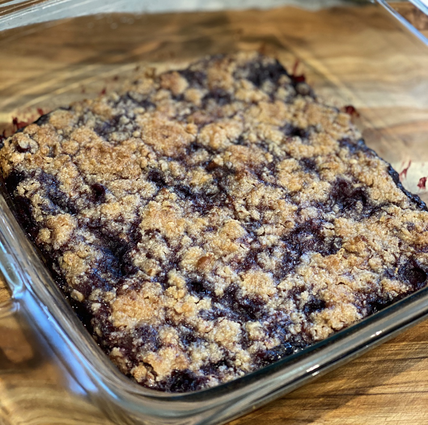
Although the picture looks more like a blueberry, this is most certainly a Cherry Crisp! A lighter, more simple, and vegan version of the Berry Crumble Bars recipe I posted earlier this year. If making this I do suggest using a 6" skillet or small baking dish - the 8x8 dish I used thinned the crisp out a little too much, in my opinion. Also, as the recipe suggests, topping with ice cream or coconut whipped cream would totally complete this treat. I enjoyed eating this after it was in the fridge because I found that it did not stay together when cutting it warm. This might be due to using the arrowroot powder instead of the tapioca flour though. I would just reheat the slice after I took it out of the fridge and enjoy it that way. Despite all the notes I have on this one, I really enjoyed having this throughout the week as a snack or after-dinner treat. I always prefer to have homemade treats instead of packaged ones, and with extra time at home due to COVID I was happy to finally try this delicious recipe out! Super simple, easy, and enjoyable!

​Cherry Crisp (Gluten Free, Paleo + Vegan)
Ingredients:
  • 10 oz. dark cherries pitted and halved (I used fresh, but frozen can be used if fresh are unavailable)
  • 1 tablespoon maple syrup
  • 1 tablespoon tapioca flour (I used arrowroot powder)
  • ½ teaspoon cinnamon
For the crisp
  • ½ cup blanched almond flour
  • ¼ cup flaked coconut chopped into bits
  • 2 tablespoons maple syrup
  • 2 tablespoons coconut oil softened (use refined for no coconut flavor)
  • 2 tablespoons pecans chopped
Directions:
  1. Preheat the oven to 350ºF. Lightly grease a 6” skillet or small baking dish with coconut oil.
  2. In a medium mixing bowl, stir together the cherry halves, maple syrup, tapioca flour, and cinnamon. Pour into the prepared pan.
  3. In the same bowl, combine the almond flour, flaked coconut, maple syrup, coconut oil, and pecans. Stir until the dry ingredients are completely moistened and then crumble evenly over the fruit.
  4. Place on a baking sheet and bake for 35-40 minutes, until the fruit is bubbling and the topping is golden brown. Serve warm with ice cream or coconut whipped cream.

Original recipe found here
0 Comments

Berry Crumble Bars

1/13/2020

0 Comments

 
Picture
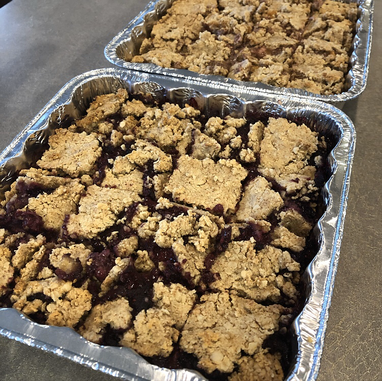
Tried this Berry Crumble Bar recipe this year for our NYE trip and it turned out delicious! I made one with all the berries (blue, black, red, and rasp) and another with strawberries, bananas, and peach. I prepped the filling a couple days before, then the crust and crumble were very easy to whip together the morning of breakfast. Not many ingredients whatsoever, paleo, gluten free, dairy free, and vegan, and still tastes amazing to all the people who like their gluten and dairy. It was kind of fun choosing which berries to use, and next time I'll definitely try another variation of fruits. Per the original recipe below, macros per 16 servings are 3.8g Protein, 5.6g Fat, and 18.6g Carbs. Add some eggs with this or any other protein source and you have a well-rounded delicious breakfast option. Let me know if you give this one a try! ​

Berry Crumble Bars
Ingredients:

Crust + Crumble
  • 1 1/2 cups almond flour
  • 1 cup rolled gluten free oats
  • 1 tsp baking powder
  • 1/2 tsp salt
  • 1/2 cup maple syrup
  • 1/3 cup almond butter
Filling
  • 2 cups frozen berries (I did 1 cup each frozen raspberries + blueberries)
  • 1 Tbsp lemon juice
  • 2 Tbsp maple syrup
  • 1/4 cup chia seeds (I ended up using ground chia seeds)
Directions:
  1. Preheat oven to 350F and line an 8×8 baking pan with parchment paper or nonstick spray.
  2. Warm berries, lemon juice, and maple syrup in a saucepan on medium heat.
  3. Continually mash with a fork or potato masher until berries are bursting.
  4. Turn off heat and add in chia seeds.
  5. Stir and let cool completely, putting in fridge for 30 minutes, allowing the mixture to firm up.
  6. In a bowl, combine almond flour, oats, baking powder and salt.
  7. Add in maple syrup and almond butter and stir, feel free to use your hands to make sure everything is blended completely. You should be able to pinch the mixture and have it stick together.
  8. Save a heaping 1/2 cup of dough to the side and flatten the rest into the 8×8 dish, pressing down firmly on the bottom. Set aside.
  9. After jam has chilled in the fridge, pour berry filling over top of crust.
  10. Sprinkle remainder of topping evenly over top of filling and bake for 35-40 minutes or until golden brown.
  11. Let cool before cutting. 
  12. Enjoy! Store in fridge.

Original recipe found here
0 Comments
    Picture

    Erika Copeland

    Sharing the recipes I prepare to help others eat more nutritious food and begin their journey to a healthier life.

    Instagram

    categories

    All
    AIP
    Beef
    Breakfast
    Brussels
    Burgers
    Casserole
    Cauliflower Rice
    Chicken
    Crockpot
    Kombucha
    Low FODMAP
    Meal Prep Tips
    Nutrition Blog
    Pork
    Pressure Cooker
    Quiche
    Sausage
    Shrimp
    Snacks
    Steak
    Sweet Potatoes
    Treats
    Tuna
    Turkey
    Vegan
    Video
    Whole30

    Archives

    December 2021
    November 2021
    September 2021
    August 2021
    July 2021
    June 2021
    May 2021
    April 2021
    March 2021
    February 2021
    January 2021
    December 2020
    November 2020
    September 2020
    August 2020
    July 2020
    June 2020
    May 2020
    April 2020
    March 2020
    February 2020
    January 2020
    December 2019
    November 2019
    October 2019
    September 2019
    August 2019
    July 2019
    June 2019
    May 2019
    April 2019
    March 2019
    February 2019
    January 2019
    December 2018
    November 2018
    October 2018
    September 2018
    August 2018
    July 2018
    June 2018
    May 2018
    April 2018
    March 2018
    February 2018
    January 2018
    December 2017
    November 2017
    October 2017
    September 2017
    August 2017
    July 2017
    June 2017
    May 2017
    April 2017
    March 2017
    February 2017
    January 2017
    December 2016
    November 2016
    October 2016
    September 2016
    August 2016
    July 2016
    June 2016
    May 2016
    April 2016
    March 2016
    February 2016
    January 2016

Powered by Create your own unique website with customizable templates.
  • Home
  • All Recipes
  • Goal
  • About
  • FAQ
  • Contact