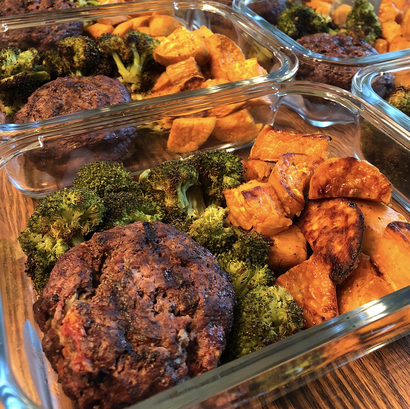
 I made this Instagram post a couple weeks ago about where my nutrition journey started in 2013 and a friend commented about the avocado and sun-dried tomato stuffed burger I was "food logging". Honestly, I totally remember that burger being SO tasty, so I found it and brought it back! It also brought back even more memories of all the paleo food blogs that helped get me started with my journey. It is truly my biggest hope that my blog here is that same resource for many others who are either just getting started on their nutrition journey or need some motivation and help along the way. If you are reading this, thanks for visiting the site and feel free to reach out if you ever have any questions! I didn't have it all figured out in 2013, but every year I made small improvements. That one small improvement you can make today is simply making one nutritious meal to eat, like this one. Plus, it's really delicious and now you have a weeks worth of one daily nutritious meal to eat! More about the burger though...there are only 4 ingredients plus salt and pepper. I have been eating them all week and haven't noticed the avocado turning that gross brown color either. I think the key for that is to make sure the avocado mixture is truly stuffed inside the burger and not finding it's way out the sides. Also, I have found it tough finding sun-dried tomatoes that don't have any added ingredients or preservatives in them. My recommendation is to find some fresh ones in the produce aisle or at your local natural market if you can. Let me know if you give this one a try and what you think!
Avocado and Sun-dried Tomato Stuffed Burgers Ingredients:
Original recipe found here My Roasted Sweet Potatoes Ingredients:
2 Comments
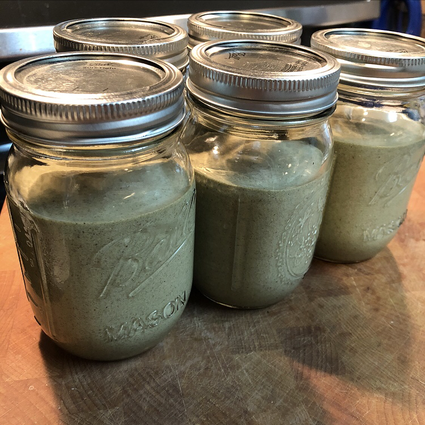 I've been prepping my moms meals for over a year now with the goal to just help improve her overall health and quality of life. Well just like in my own nutrition journey, once you find your groove with one thing you never stop and live there satisfied. Instead, this is a point where you ask yourself, "how can I make this better?". Now I'm not looking for something drastic to implement, but rather just find one small thing to improve on. With my mom, it's easy to pack her lunch and dinner with vegetables, but breakfast is more difficult. I mean really, how many vegetables can I pack into egg muffins? I decided a Super Greens supplement was worth the try to get more nutrients into her diet. I personally enjoy the original version, but I purchased the berry one to hopefully mask the "green" taste. Unfortunately, even the flavored ones are super strong tasting, so I came up with the smoothie recipe below to help mask the taste and make it a delicious smoothie she enjoys each morning. Side note, I never tell her when I implement these nutrition changes (err experiments), so she has no idea I did this, and she didn't complain once! My mom is not one to hide her distaste for foods either, so this was a huge success and indicator that the smoothie was indeed delicious! I'll probably continue to experiment with adding other nutritious ingredients like chia seeds, berries, spinach, or even some avocado. Just use the recipe below as an outline and swap ingredients for ones you know you enjoy! I love the Vanilla Nut Paleo Protein because it has a probiotic blend in it, but I have used both the Vanilla Nut and Double Chocolate in these smoothies. Note, the chocolate flavor does cover up the green color of the smoothie better, so I might do a combination of half and half in the future. As for the Amazing Grass Super Greens, the product is organic, vegan, and free of soy and sugar. The main ingredients include wheat grass, barley grass, spirulina, a blend of antioxidants, and a blend of digestive enzymes and probiotics. For the quality and price, I prefer using this brand, but there are a ton of other super green products out there to choose from. I typically will prep the recipe below and store in mason jars in the freezer. I recommend taking one out of the freezer and leaving in the refrigerator the night before to thaw out, or you can defrost it in the microwave for 5 minutes the morning of. For those interested, I also included a snapshot of the nutrition facts below with the ingredients that I used and indicated. Let me know if you try a version of this out and what you think! Super Green Strawberry Banana Smoothie (Servings: 5) Ingredients:
**Canned coconut milk is more rich in flavor, but you can also use boxed coconut or almond milk if you prefer, just check the ingredient label for one with no unwanted additives and sweeteners. 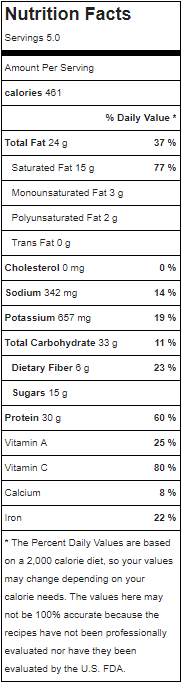 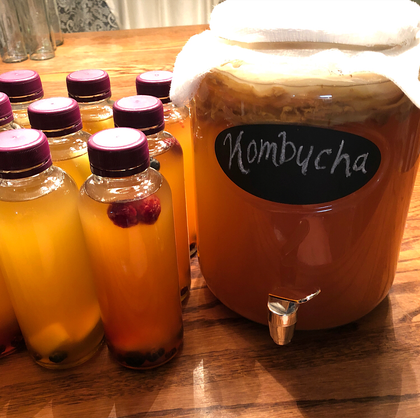 Slightly different blog post on another staple "meal prep" that I have been making for over three years now, Kombucha! I'll get more into what Kombucha is all about below, but ever since my friend helped me get started I've never looked back, and I've also continuously helped others get started as well. As I recently gave away another SCOBY (keep reading below for more on what that is) along with directions for the Kombucha making process, I realized for the amount of times I share these directions I should just make a blog post about it. SO here it is! Leave a comment if you have any questions or need more help getting started!
What? Kombucha is a beverage produced by fermenting sweet tea with a culture of yeast and bacteria (technically referred to as a symbiotic culture of acetic acid (vinegar) bacteria and yeast, or a SCOBY), also known as probiotics. Our body's are full of good and bad bacteria, and probiotics are helpful bacteria to keeping your gut healthy! Why? Your digestion system and gut health matter, I mean that's where your food is processed! Here are just some symptoms that suggest your gut health is not working up to par:
How? Making your own Kombucha is easy and extremely cost-effective (buying a bottle from the store everyday = $$$)! Here's what you need to get started:
Notes: Your SCOBY grows, so every 3 or so batches I peel mine in half and save it to give to someone who might want to try making their own Kombucha. When I do this, I store the SCOBY in a clean mason jar, add some of my Kombucha tea so they have their Starter Tea, then seal the jar tight and leave it in the fridge. Again, when stored in the fridge, the fermentation process stops, so you can leave it in there until you are ready to start your batch. The optional funnel is to help pour your Kombucha into the bottles, but if you purchase a Gallon-Size Glass Jar with a dispenser then you will have a much cleaner and enjoyable time bottling your Kombucha. The optional strainer is to strain the fruit from the bottles before drinking, or you can just leave the fruit in there and answer everyone's questions as to what the hecht you are drinking, or is it Moonshine, if you want! If you do strain the fruit, you also might need the funnel to help pour the Kombucha back into the bottles. For the 7-8 smaller bottles you can get fancy and purchase your own, or when I first started I simply washed and reused Kombucha bottles that I had bought from the store. Last, but not least, for those who have never tried Kombucha or a probiotic supplement before, I highly encourage you to ease into things slowly. A cup of Kombucha or half of the prescribed probiotic amount is always a good place to start, see how your body responds, and go from there. If any of this digestion and gut talk sparked your interest or concerns about your health, click that nutrition coaching tab above and lets chat! I used this website for help when I first started making my own Kombucha and for reference in the directions above. Check it out for further information and help! |

Erika CopelandSharing the recipes I prepare to help others eat more nutritious food and begin their journey to a healthier life. categories
All
Archives
December 2021
|
