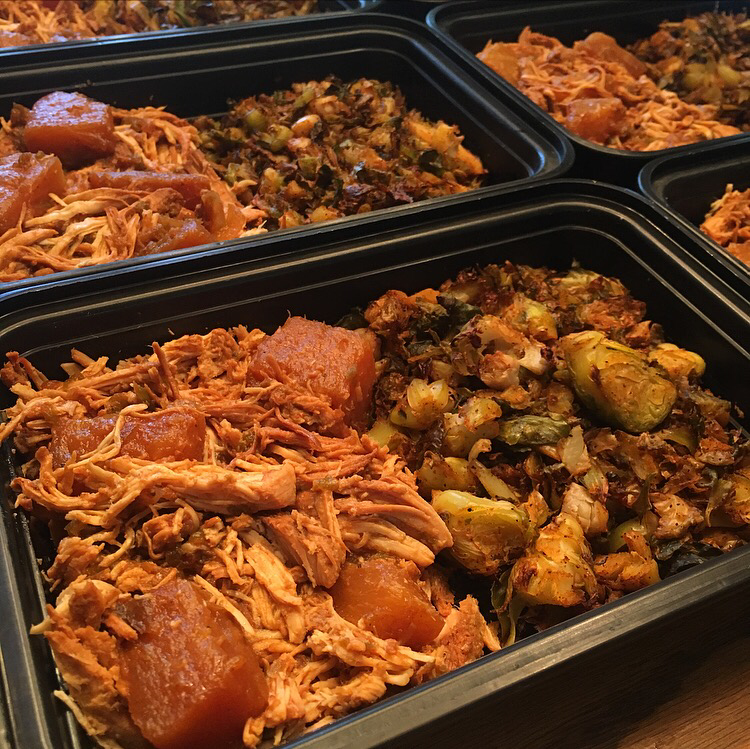
 It's summer time, which means all the crockpot meal preps and all the planning ahead. I was looking into freezer crockpot meals and found this blog post with 31 crockpot recipes you can freeze ahead of time. I've never tried freezing crockpot meals, but it's that time of summer when life gets really busy, and with prepping for mom as well, I figured this would really help me out. My go-to options for paleo BBQ sauce are Tessemae's BBQ sauce or Steve's PaleoChef Peach BBQ, both sold at the Whole Foods near me, which is super convenient! For this recipe I used Tessemae's BBQ sauce and I prepped and froze the ingredients beforehand as the recipe calls for. The pineapple BBQ mix was a sweet barbecue taste and the chicken turned out delicious. The barbecue spiced brussels sprouts on the other hand were more of a spicy barbecue taste, but still very yummy as well. I definitely recommend using no more than 2 Tbsp of that homemade BBQ rub with the 2lbs of brussels. The recipe makes close to 4 Tbsp and that is way too much to use all at once. Anyways, if you really like barbecue then this is a meal for you!
Slow Cooker Paleo Hawaiian BBQ Chicken Ingredients:
Original recipe found here Crispy Barbecue Spiced Brussels Sprouts Ingredients:
Inspired by this recipe
0 Comments
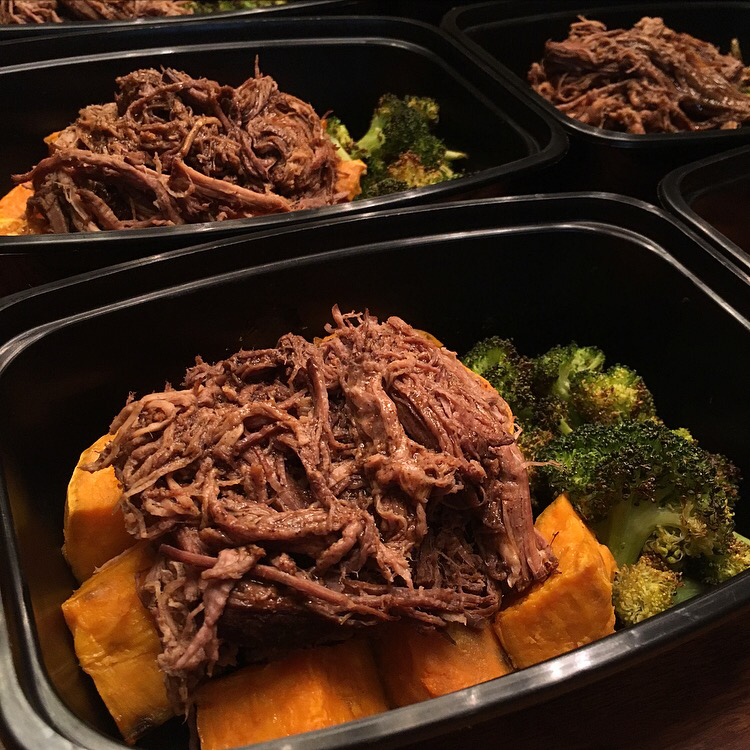 I am taking a class all this week, so I wanted to make my meal prep easy, but also make sure I made an amazing meal to look forward to eating all week. I've made this balsamic pot roast before and it's so incredibly yummy. Ironically my friend sent me a picture of this meal last week saying how delicious it was too. She threw this in the Instapot for 30 minutes, so if you have that appliance and want a quicker meal prep then there you go! Also, even my family has implemented this one into their rotation of dinner recipes and I'm sure those of you cooking for your whole family understand the challenge of finding something healthy that everyone will eat. Basically what I am saying is you need to give this recipe a try! I decided to pair this with some roasted sweet potatoes like I did last time because I really enjoyed that combination. I am not sure I've ever picked two crockpot meals for meal prep before, but I knew I was going to have a busy weekend and even busier week, so I tried reducing the stress of meal prep a little bit. I cooked one of the crockpot meals over night and threw the other meal in the crockpot first thing in the morning. This worked out perfectly and really helped my meal prep on Sunday, so if you are in need of a new suggestion for easier meal preps then give that a try. Also, give this pot roast recipe a try too! You will not be disappointed!
Slow Cooker Balsamic Pot Roast Ingredients:
Directions:
Original recipe found here My Roasted Sweet Potatoes Ingredients:
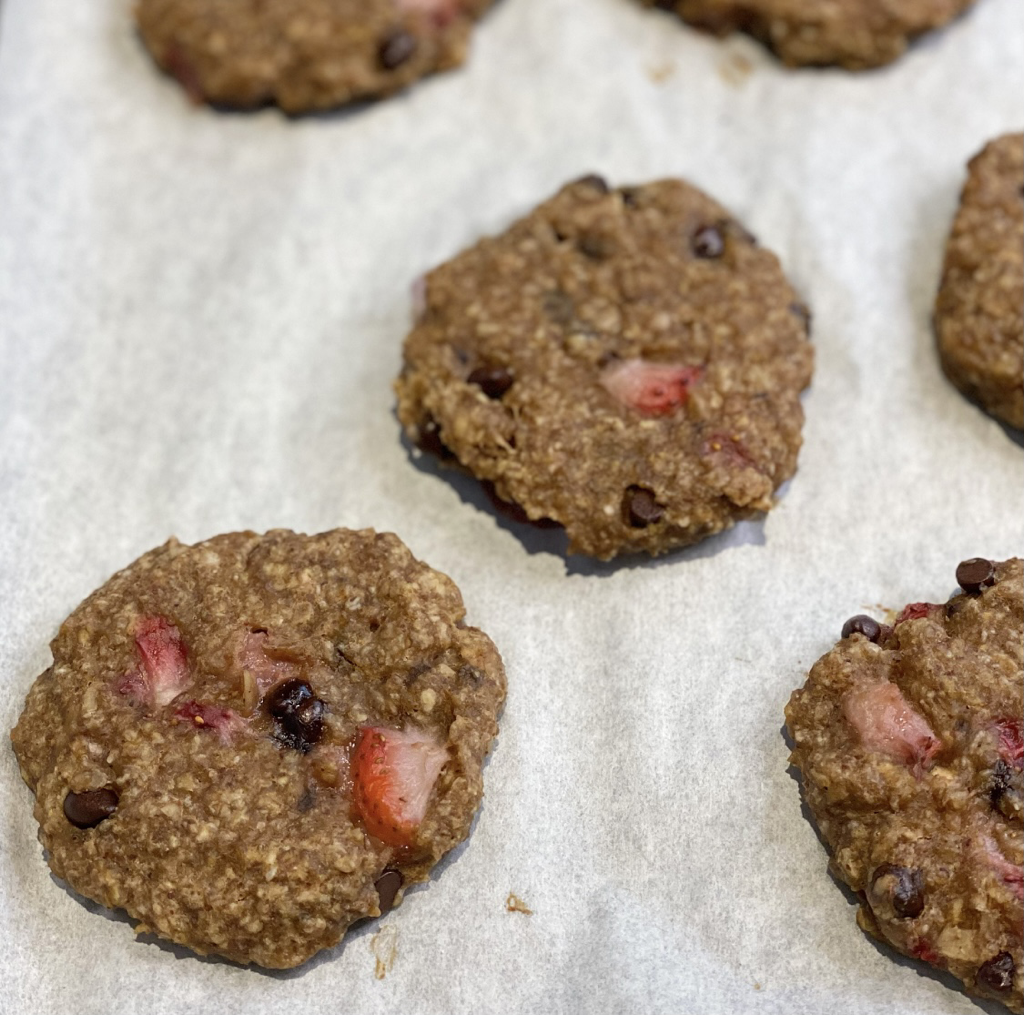
 I've recently been posting more breakfast/snack-type muffin recipes because that's what I have been prepping for my mom to eat. However, this sweet potato muffin recipe was 100% for me! I came across a delicious looking and simple-ingredient sweet potato paleo pancake recipe (link is below) and saved it to make one of these weekends. Then I got to thinking how I am in this class all week and how I will most definitely need to pack a lot more food than normal. This is how I came about turning that pancake recipe into a muffin recipe and found the best snack ever to pack for the week. I subbed out the coconut flour for a scoop of Paleo Protein and thought it worked out perfectly. There is no need to add protein powder if you don't want it though. Next time I make these I'm going to use coconut flour as the recipe calls for. Anyways, these turned out delicious and I was happy to have a carb filled snack on-the-go that wasn't fruit!
Sweet Potato Paleo Pancake Muffins Ingredients:
Inspired by this recipe  This meal was sweet and delicious! This picture does not do the meal any justice, in my opinion. The chicken was a SUPER easy crockpot recipe and a must save for when you have no time to meal prep. I was real resourceful and measured and mixed the balsamic vinegar, honey, and spices in one measuring cup, then poured the mixture over the chicken. The original recipe called for 8 chicken thighs (bone-in, skin removed), but I used about 3 lbs of chicken breast instead (I cooked a few extra meals for my mom). Since that was a lot more chicken I also increased the balsamic vinegar from 1/3 cup to 1/2 cup and used two zucchinis instead of one. Other then those swaps, I made the recipe as-is and those measurements are indicated below. I have to note that there was a ton of left over sauce though, so I think next time I'll keep it at 1/3 cup balsamic vinegar. Anyways, the fried cauliflower rice was equally amazing and a really great pair with this chicken. I accidentally used fresh grated ginger instead of ground ginger, but I ended up loving that fresh ginger taste a lot and would do it that way again. I also used my food processor to dice up everything in both meals. Not only does that save me some time in the kitchen, but I also just personally like my veggies diced real small. I loved this meal and am absolutely looking forward to having it all week! I definitely recommend these two recipes to anyone.
Crockpot Garlic Honey Chicken Ingredients:
Original recipe found here Paleo Cauliflower Fried Rice Ingredients:
Original recipe found here 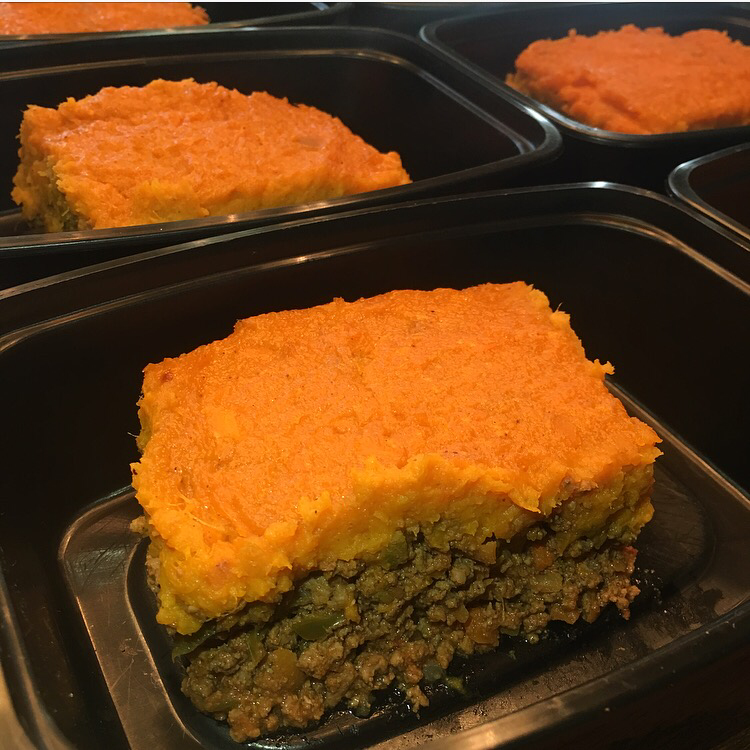 I mentioned last week that it was time to pick out some casserole dishes to make for meal prep, so here is another good one! If you've never made a paleo Shepherd's Pie before then you are missing out. I have never made one that I disliked, plus they are super simple to prep and throw in a casserole dish to bake. I decided to try out this new recipe below, but if you scroll through the casseroles category (on the side bar to the right) you can find a couple other ones that I've made in the past (or you can just type Shepherd’s Pie in the search bar). This particular one turned out amazing though! I diced the pepper, onion, and carrots in the food processor because I was lazy this weekend and did not want to do any chopping. Just throwing that note out there for anyone else that finds chopping to be too consuming. Also, the original recipe calls for flaxseed meal instead of egg whites, so if you have that ingredient and want to use it then check out the link below. This Shepherd's Pie turned out so delicious and is definitely worth trying!
Shepherd’s Pie with Sweet Potato Topping Ingredients:
Original recipe found here  How delicious do these look and sound!? I did not actually try them because I made them for my mom's breakfast all week, but I had a taste tester tell me they were good! This recipe definitely spiced up the egg muffin game and are worth trying if you are sick of the typical eggs and bacon combo. Make sure you check the ingredients on the sausage you pick out and get one without any added sugar. I used a 10 oz package of cooked Italian sausage, which ended up making this recipe yield 18 muffins. Also, I soaked my sun dried tomatoes, drained them, then cut them up real small, so that there was never an overwhelming bite of tomato. Another easy, quick, and successful breakfast prep that is worth giving a try!
Sausage Pizza Egg Muffins Ingredients:
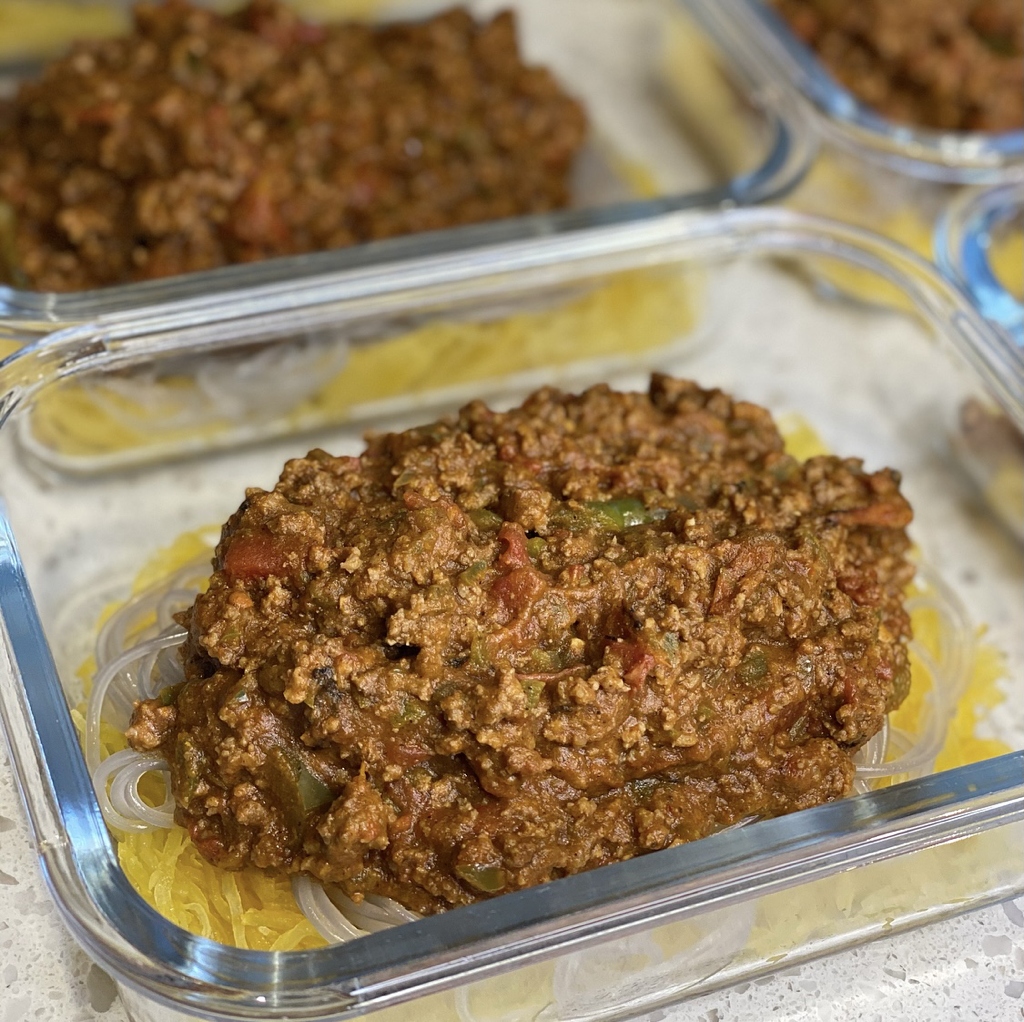
Original recipe found here 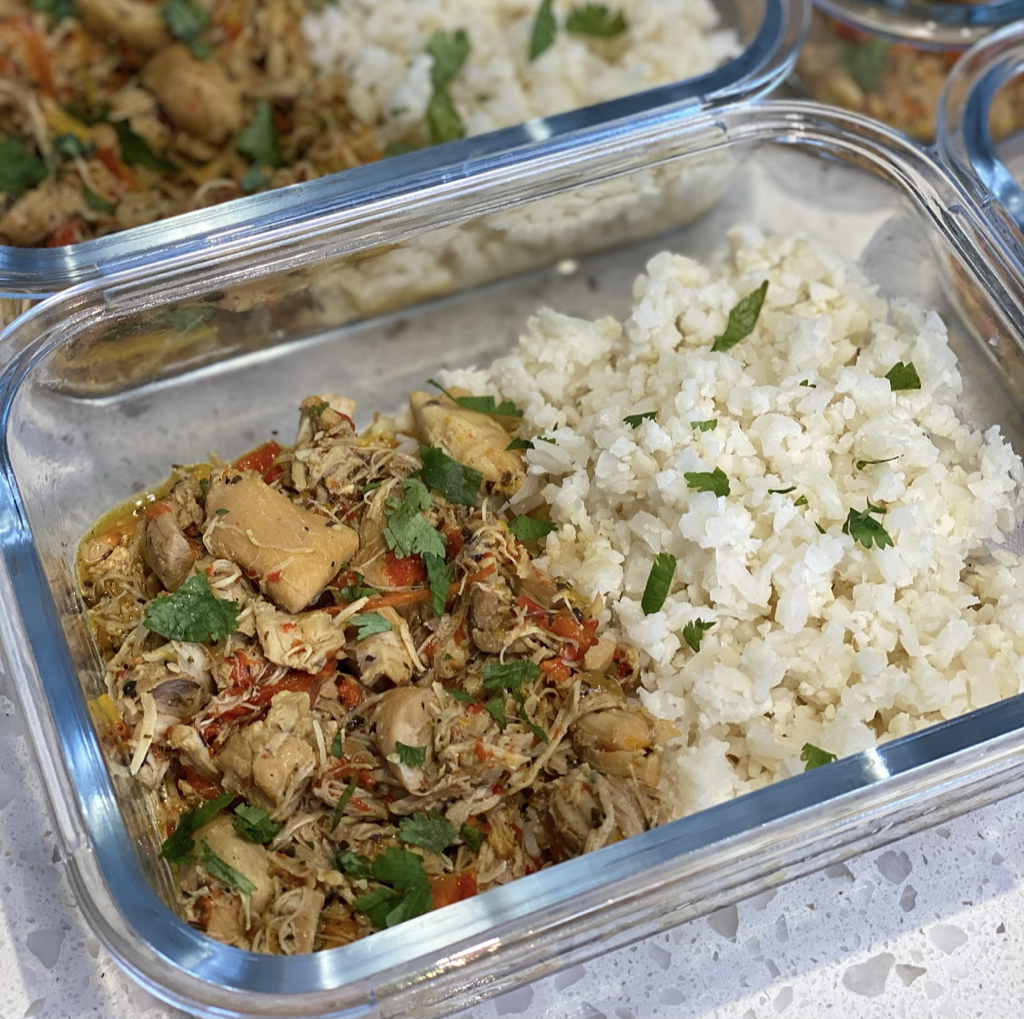 Who doesn't love casseroles!? It's been a while since I picked out a casserole recipe for meal prep, so it's time to bring them back. Casseroles are always a great option for meal prep because they typically have little prep and you end up tossing everything together in one baking dish, which eliminates time in the kitchen and time cleaning dishes! Anyways, the original recipe did not add broccoli to the casserole, but I thought this meal could use some more veggies so I threw those in. The original recipe also only called for 1 lb of shredded chicken and 1 egg, but I doubled both of those as you can see. Note, there is no instruction on shredding the chicken. You can bake (or broil) the chicken, let it cool, then throw it in a food mixer to shred, which is what I did. If you are short on time you can also buy a rotisserie chicken and pick that apart to use for this dish. I thought this meal turned out tasting very much Italian and very yummy. If you are skeptical of this recipe or paleo recipes in general, then leave out the broccoli. I personally liked the addition, but I can see others not enjoying those bites. Other then that, every spaghetti squash casserole I've ever made has turned out amazing and that includes this one too. This one is definitely worth giving a try!
Italian-Style Spaghetti Squash Bake Ingredients:
Original recipe found here 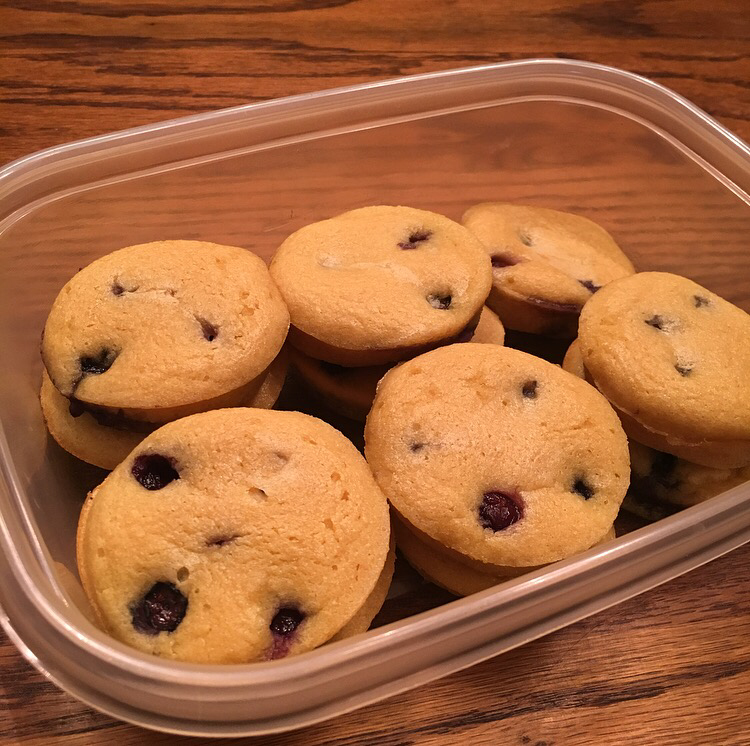 I am still trying really hard to find all the most delicious paleo food options to make for my mom. I found this Birch Benders Paleo Pancake & Waffle Mix at Whole Foods and had to give it a try. I used the mix to came up with this muffin recipe below and they turned out amazing. I probably could have taken a better picture to make them look more appetizing, but I promise they turned out tasty! I slipped in a scoop of Paleo Protein with a little bit of 100% maple syrup in hopes to mask any protein powder flavor, topped the muffins with frozen blueberries, and baked for 20 minutes. My mom loved them! There's room to play around with the recipe to your liking as well, which is why there are so many optional items listed. I am sure the fruit does not to be frozen, that is just what I used. I also only threw in 100% maple syrup to mask the protein powder, so next time I make these I'll see how they taste without the syrup. For those who are looking for a paleo breakfast option that does not include eggs, here you go! If you are eating this as a meal then I recommend the protein scoop just to add some more protein, but if you don't need extra protein then no need to add the extra scoop. Let me know if you make this one and what you tried!
Paleo Pancake Muffins Serves: 10-12 muffins Ingredients:
o Enjoy Life Dairy-Free Mini Chocolate Chips o Chopped nuts o Breakfast sausage links, cut in 4ths (check ingredients for no unwanted ingredients) Instructions:
 I am still obsessed with the the Garlic Cauliflower Mash I made a couple times last month. so this week I decided to add some sweet potatoes into the mix. The verdict: the mash turned out absolutely delicious! I am so glad I tried this out. I'm always searching for ways to mix up how I make sweet potatoes and this one is a winner. Since I picked out the mash first, I found this simple crockpot carnita recipe to pair it with. This recipe does have a hint of Mexican and spicy flavor to it, so not your typical pair for a sweet potato mash, but I thought the meal was great! I also think anything pairs well with sweet potatoes though... Anyways, I put the pork in the crockpot on high for 6 hours. Once done, I shredded the pork and threw it on a baking sheet, drizzled some of the extra sauce from the crockpot and lightly sprayed some olive oil on top, then baked for 10 minutes at 375 degrees. The recipe calls for putting the shredded pork in a skillet to crisp and brown up, but I thought baking it would do a better job.
Paleo Carnitas from Pork Tenderloin Ingredients:
Original recipe found here Garlic Sweet Potato & Cauliflower Mash Ingredients:
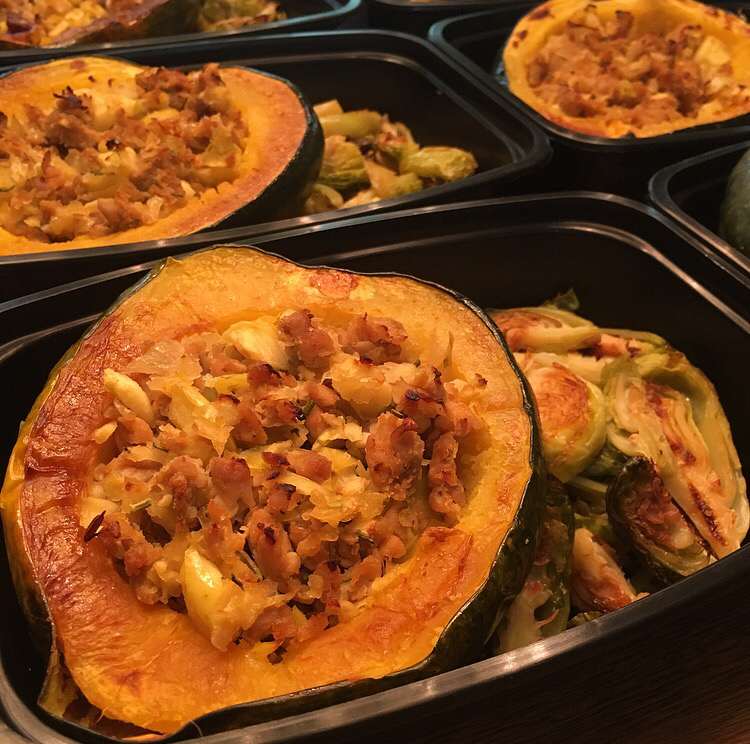 My friend really enjoyed this one a while ago and I finally gave it a try. I ended up doubling the entire recipe to make enough for eight meals, with the exception of only using 8 sausage links and 3 small/med squashes. (I made two extra meals for my mom, decided I only needed one sausage link per meal, and I ended up scooping out extra squash to complete the two extra meals.) I was a little nervous to meal prep this recipe because I've never had acorn squash before, but it was an amazing pair with the chicken sausage, apples, and caramelized onions. All the comforting fall foods! I totally forgot to add in the spinach, but I did make some roasted brussels sprouts with some of the diced apples I set aside. If you need to change up your typical meal prep, this was a flavorful, comforting, and tasty meal that I really enjoyed!
Caramelized Onion Sausage Stuffed Acorn Squash Ingredients:
*Check labels or look out for your local store's store-made sausage, since they usually leave out sugar and preservatives. You can also check out the sugar free pork breakfast sausage from U.S. Wellness Meats, or their sugar free Italian Sausage links! Original recipe found here |

Erika CopelandSharing the recipes I prepare to help others eat more nutritious food and begin their journey to a healthier life. categories
All
Archives
December 2021
|
