LiveSqueezy
  • Home
  • All Recipes
  • Goal
  • About
  • FAQ
  • Contact

Paleo Chicken Burrito Bowls

11/2/2020

0 Comments

 
Picture
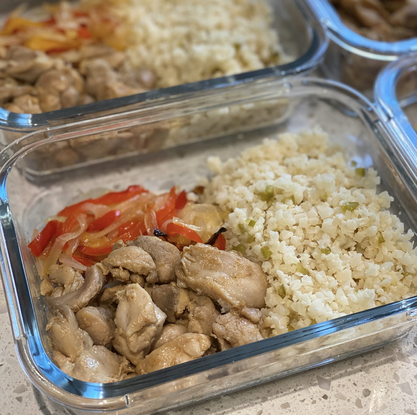
Don't let this plain picture fool you! This meal was seriously packed with SO much flavor. Top with some salsa and guacamole or avocado and you've got yourself a real delicious burrito bowl. Now I will admit that if you have to quadruple the recipe like I did, then meal prep just got a little longer. I had to do a ton of slicing and dicing, then cooked the chicken in four batches. If you can get pre-sliced peppers and onions then that always helps speed meal prep up a bit. I also opted for not making the homemade guacamole, but if you have the time definitely go for it. I especially loved the cauliflower rice recipe too! It is packed with so much flavor and was different then any recipe I have tried before. Even if you don't make this exact recipe the cauliflower rice portion is worth saving and trying out. Overall, a super delicious meal and recipe grabbed from the The Paleo Running Momma blog! 

Paleo Chicken Burrito Bowls
Ingredients:

chicken:
  • 1 1/2 lbs boneless skinless chicken thighs
  • 1 Tbsp coconut oil ghee, or avocado oil
  • 3/4 tsp sea salt
  • 1 tsp onion powder
  • 1 tsp garlic powder
  • 1 tsp cumin
  • 1 1/2 tsp chili powder
  • Large pinch Chipotle powder or more, to taste
  • Juice of 2 limes
cauliflower rice:
  • 1 lb cauliflower rice I purchased this pre-"riced”
  • 1 Tbsp coconut oil ghee, or avocado oil
  • 3/4 tsp sea salt
  • 1-2 Tbsp fresh lime juice
  • 1 jalapeño pepper minced
  • 3/4 tsp onion powder
  • 3/4 tsp garlic powder
  • Dash chipotle powder
peppers and onions:
  • 1 large onion sliced thin
  • 1 large red bell pepper sliced thin
  • 1 Tbsp coconut oil or other cooking fat
  • sea salt to taste
guacamole:
  • 2 avocados
  • 1/4 cup onion minced
  • 2 clove garlic minced
  • 1 jalapeno pepper minced
  • 2 Tbsp Tbsp fresh lime juice or to taste
  • 2 Tbsp chopped fresh cilantro plus more for garnish
  • Sea salt to taste
optional toppings:
  • Salsa, fresh herbs, sliced jalapeño
Directions:
for the rice:
  1. Heat a large skillet over medium heat and add oil or ghee. Add the riced cauliflower and stir to coat. Cover skillet and cook for about 2-3 minutes to steam.
  2. Uncover and stir, then add the jalapeño, salt, seasonings and lime juice. Cook and stir another minute or two uncovered until you have desired texture, then remove from heat and set aside.
for chicken, peppers & onions:
  1. Cut chicken thighs into bites size pieces. Season all over with all seasonings (not the lime) and heat a large skillet over medium high heat (you can move the rice to a bowl and use the same one) and add 1 Tbsp cooking fat.
  2. Add chicken and brown all over, stirring as needed. Stir and cook over medium/medium high heat for 7 mins or until cooked through. Lower heat a bit and add the lime juice, stir and continue to cook another 2-3 minutes, then remove from heat and place in a bowl.
  3. Keep the heat on medium and add another Tbsp fat to the skillet. Add peppers and onions and stir to coat with fat. Sprinkle with a bit of sea salt to taste, and continue to cook, stirring occasionally, about 5 minutes or until softened and browning, then remove from heat.
  4. To make the guacamole, mash together the avocado with the rest of the ingredients, adjusting seasonings to taste.
assemble bowls:
  1. Layer the cauli rice, chicken, peppers and onions in bowls, then top with guac and any other desired toppings. Serve right away and enjoy!

Original recipe found here
0 Comments

Chinese Pepper Steak

6/8/2020

0 Comments

 
Picture
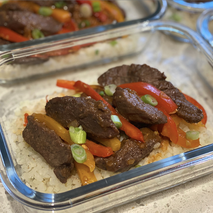
Another I Heart Umami recipe that did not disappoint! If you can purchase sirloin steak I definitely recommend trying this one out! I ended up using a chuck roast and that was not the right cut of meat for this type of recipe whatsoever. The meal still turned out delicious, but I spent a lot of time cutting out fat to try and slice thin cuts of meat. The seasonings and homemade Worcestershire sauce were on point though and seriously made this into a true tasting Chinese Pepper Steak meal. Also, the Worcestershire sauce recipe makes extra sauce that you can save and use for making steaks another time. All around, this was a relatively simple and one skillet recipe that turned out tasting delicious!

Chinese Pepper Steak
Ingredients:
  • 1 lb. sirloin steak, thin sliced against the grain
  • 1 green + 1 red bell peppers, sliced to thin strips*
  • 3-4 garlic cloves, thin sliced
  • 1 large shallot, sliced to thin strips
Beef seasoning:
  • 2 tbsp coconut aminos
  • ¼ tsp garlic powder
  • ¼ tsp onion powder
  • 2 tsp toasted sesame oil
  • 1 tsp arrowroot flour
  • Less than ½ tsp baking soda
  • Coarse salt and pepper to taste*
Paleo Whole30 Worcestershire sauce: (makes about ⅔ cup)
  • 1/2 cup beef stock
  • 3 tbsp tomato paste, no salt and sugar added
  • 1 tbsp aged balsamic vinegar
  • 2 tbsp coconut aminos
  • 1/4 tsp onion powder
  • 1/4 tsp garlic powder
  • 1/4 tsp mustard powder
  • 1/8 tsp sea salt
  • 1/8 tsp cinnamon powder
  • 1/8 tsp black pepper
Directions:
  1. Prep: Thin slice the beef against the grain. Add beef seasonings. Mix well and set aside in the fridge. Thin slice bell peppers*, prep aromatics, and combine (stir-well) ingredients under Worcestershire sauce.
  2. Beef: In a well-heated large stainless steel skillet, add 1.5 tbsp cooking fat of your choice, pan sear the beef until they’re slightly charred. Do this in separate batches. Set aside along with the juice in the skillet.
  3. Combine: Add a bit more oil to the same skillet, add sliced garlic and shallots. Season with a bit salt, saute until fragrant (about 8-10 seconds). Add bell peppers. Season with a bit more salt, saute until the peppers turn slightly softer yet still crunchy. Add ¼ cup Worcestershire sauce, add beef back to the skillet. Give a quick toss to coat the sauce over. Taste and see if more salt or sauce is preferred.
  4. Serve hot and immediately with cauliflower rice, mashed potatoes, or simple salad.
Notes
  • For AIP version, swap bell peppers for carrots and/or celery. Slice them to match stick thin. Omit black pepper.
  • For thicker Worcestershire sauce texture: bring the sauce to simmer over stovetop, let it simmer and stir frequently for about 1 minute. Cool and store in the refrigerator.
  • To make ahead - Season thin sliced beef. Store in fridge (for serving next day) or freezer. Pre-make worcestershire sauce. Store in glass container in the fridge. Finish within 3 weeks for best flavor.

Original recipe found here
0 Comments

Crockpot Sweet and Sour Hawaiian Beef

5/11/2020

0 Comments

 
Picture
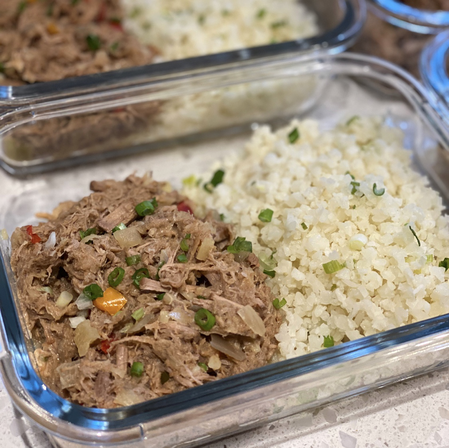
This was the most spot on Sweet and Sour tasting and delicious meal ever! Seriously though, I will be making this one again very soon it was that much of a hit in our house. I ended up using the slow cooker option on my Instant Pot for this meal, so I could brown the meat and cook all in one pot. Plus, I was able to put the pot on saute mode at the very end to thicken up the sauce a little more. I definitely recommend doing the same if you have an Instant Pot, but if not this meal will still turn out delicious in the Crockpot - just one more pan to clean when you're done ;-). The only change I made to the recipe is using half the honey, and that was just by preference. The meal still turned out plenty sweet with a little less honey if you want to do the same. If you find ginger at the store definitely add in that fresh grated ginger too! The beef does stay in small 1-2 inch cubes if you properly brown them, but I opted to shred it at the end while I was reducing the sauce. My beef also turned out looking like pork, probably because I diced it up a day before cooking it and exposed it to more oxygen. Oh well it still turned out so good! I heated up some coconut oil and tossed some plain frozen cauliflower rice, salt, and extra green onions to pair with this. Add this recipe to your list of must-trys now! 

​Crockpot Sweet and Sour Hawaiian Beef
Ingredients:

​Sweet and Sour Pineapple Sauce
  • 16 ounces (two 8 ounce cans) of crushed pineapple (in juice not syrup) – drained and reserve juice in a small bowl.
  • 1/4 cup apple cider vinegar
  • 1/4 cup coconut aminos 
  • 2 tsp minced garlic
  • 2 tbsp honey (I reduced to 1 tbsp and it was still plenty sweet)
  • 1 tbsp of fresh grated ginger or pinch of ground ginger (optional but delish!)
For the Slow Cooker/Crockpot
  • 2 lbs boneless beef loin cut into 1–2 inch pieces, or you can purchase stew meat precut. Best to trim excess fat for before cooking. See notes for other meat options.
  • 2–3 tbsp Oil to brown meat
  • black pepper to taste
  • kosher salt to taste
  • 1–2 tsp crushed red pepper
  • 1 cup chopped red onion
  • 1 bell pepper – diced, seeds removed. (see notes for substitutes)
  • For plating – chopped green onion and/or cilantro to garnish. To serve with rice or cauliflower rice.
Optional Slurry to thicken
  • 1 tbsp Arrowroot starch
  • 1/2 tbsp cold water
Directions:
  1. Drain the canned pineapple and reserve the juice. Place pineapple aside and juice in a small mixing bowl.
  2. Next, whisk together the pineapple juice, cider, coconut aminos, garlic, ginger, and honey. Whisk until honey is combined (dissolved) with other ingredients. Set aside.
  3. Heat a medium size skillet with 2 tbsp oil. Lightly sprinkle the diced beef cubes with coarse kosher salt and pepper. Place meat in the pan and then brown meat on medium high, turning beef cubes to brown all sides. About 3-4 minutes.
  4. Place the browned meat in the slow cooker and sprinkle crushed red pepper flakes on top.
  5. Add the chopped onion and sweet and sour pineapple sauce to the crockpot/slow cooker. Mix together.
  6. Cover and cook on low setting for 5-6 hours or on HIGH heat for about 3 hours, or until the meat is cooked through and tender.
  7. After the meat has been cooked, mix in the crushed pineapple and bell pepper. *Note – if you would like thicken the stew/meat mix, add the arrowroot starch slurry here.  First dissolve the arrowroot starch and cold water in a small bowl to create a slurry then mix into slow cooker.*
  8. Cook on high for additional 20-30 minutes or until peppers have softened and juice has thickened.
  9. Spoon meat and juice over rice or cauliflower rice. Garnish with chopped green onion and/or cilantro.
Notes:
  • Feel free to use pork or turkey stew meat or pork loin as a beef substitute. Cooking times may vary.
  • 1 cup diced celery may be used in place of pepper if desired.

Original recipe found here
0 Comments

Whole30 Thai Chicken Cauliflower Rice

4/27/2020

1 Comment

 
Picture
Another super delicious one that I'll be saving to make again real soon! Just like the Pineapple Ginger Chicken I recently posted, this one is a really simple homemade sauce that can easily be used with any meat and grilling combo. Note that the chicken does have to marinade for at least 30 minutes. If you have the time, make the sauce the day before or the morning of to allow the chicken to marinade. This also makes for an even simpler and quicker cooking time later. Anyways, I especially loved the hint of curry, and the extra sauce to mix in with the cauliflower rice also made for an extra tasty meal. Similar to the instructions below, I first grilled the chicken on an indoor grilling pan, then moved all the chicken over to bake for the remaining time. I would have used the skillet to finish cooking the chicken, but I doubled the recipe and had too much chicken to put into one skillet. Other then that I made the recipe as-is below. Not much to this one at all and it seriously turned out tasting so good. I definitely recommend giving this one a try! 

Whole30 Thai Chicken Cauliflower Rice
Ingredients:
Sauce
  • 2/3 cup dates pitted
  • 4 garlic cloves
  • 4 tablespoon red curry paste (Thai Kitchen Red Curry Paste is a compliant one!)
  • 1 cup chicken stock
  • 1 cup coconut aminos
  • 1 teaspoon paprika
  • 1 teaspoon sea salt
  • lime juice from 1 lime
Other Ingredients
  • 4 large chicken breasts
  • 32 oz cauliflower rice
  • 16 oz broccoli rabe
Directions:
  1. Puree ingredients for sauce in a blender until smooth.
  2. Marinate chicken breast in 1/3 the sauce and put in the fridge for 30 minutes.
  3. Cook chicken on either a grill pan or skillet (I did both!). Place chicken on a well greased pan, cover with a lid, and cook for 5-6 minutes on each side until cooked through (there should be no pink on inside when cut open).
  4. Once the chicken is cooked, remove, and add broccoli to cast iron skillet and cook in leftover juices until it's soft, but not mushy.
  5. In the cast iron skillet, pour the rest of the sauce over the cauliflower rice and cook for about 10 minutes until soft (stirring on occasion to prevent sticking to the pan). Then serve with chicken and broccoli.

​Original recipe found here
1 Comment

​Pineapple Ginger Chicken

4/13/2020

0 Comments

 
Picture
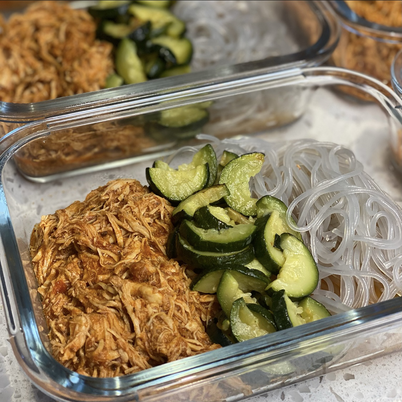
Finally found a non-Instant Pot chicken meal that was simple and easy for meal prep. I've made similar recipes before, but this one is definitely the easiest and turned out so flavorful and delicious. While you cook the chicken, put all the pineapple ginger sauce ingredients in your blender, and that is really all the work you need to do. Big note on those medjool dates is to make sure you get them pitted! I did not and totally forgot to take the pits out before blending, and that ruined my first batch of sauce. Since I had to start over I was also left without any extra pineapple for topping, which was a bummer too. Other then that mishap, everything was smooth sailing with this recipe. I heated up some frozen plain cauliflower rice to pair with it since there was plenty of delicious sauce to top with at the end. I also opted for baking the chicken breast in the oven since I quadrupled everything below to get enough meals for the week. I thought that option worked out just as great if you'd rather do the same. I tend to shy away from a lot of "sauce" recipes because they usually involve so many ingredients, but this one literally has 5 ingredients! Even if you don't make the chicken part, I definitely recommend saving the sauce recipe for some grilling recipes this summer.

Pineapple Ginger Chicken
Ingredients:

Chicken
  • 2 tbsp olive oil, extra virgin
  • 4 chicken breasts
  • 1 tbsp dried parsley
  • salt & pepper
Pineapple Ginger Sauce
  • 1/2 cup water
  • 1/2 cup coconut aminos
  • 1 cup fresh pineapple, diced
  • 5 medjool dates, pitted
  • 1 to 1 1/4 inch knob of ginger
To Finish
  • 1 cup fresh pineapple, diced
  • fresh parsley for topping, chopped
Directions:
Chicken
  1. Add olive oil to saute pan or cast iron skillet. Heat pan to medium high heat.
  2. Add chicken to hot pan. Sprinkle salt, pepper, and dried parsley on top of each breast. Cook until browned, about 5 minutes. Flip. Cook other side until browned, about 5 minutes. Turn chicken over so your herbed side is facing up. Turn off heat.
Pineapple Ginger Sauce
  1. Peel your ginger knob. (You don't need to dice it as it will blend just fine once peeled.) It should be between 1 and 1 1/4 inches in length.
  2. Add all sauce ingredients to blender. Blend until smooth.
To Finish
  1. Pour blended sauce into the pan with your chicken. Add cup of chopped pineapple around chicken. Reduce heat to medium low or low. Cover and simmer for 5 minutes. Sauce will reduce a bit.
  2. Top with fresh chopped parsley and serve!

Notes:
Why medjool dates versus other kinds of dates? Medjool dates are picked early which means they tend to be very soft. This makes them awesome for blending and creating sauces. Yes, it does matter what kind of date you use!

Original recipe found here
0 Comments

Sweet Potato Chicken Curry

4/6/2020

0 Comments

 
Picture
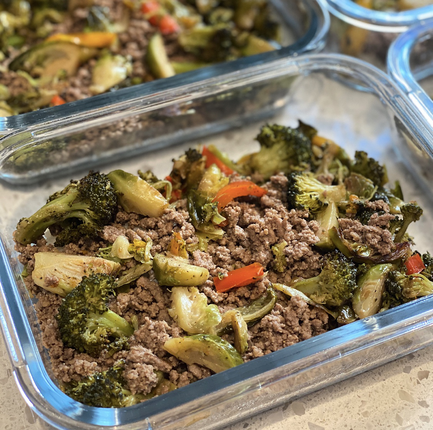
I hope everyone is staying home and healthy, and also considering trying some new recipes or meal prep with this extra time at home we all have! I am finally going through a list of recipes I had saved to try for quite some time now, including this one that turned out absolutely delicious! This recipe is Instant Pot and Slow Cooker friendly, and did not have much prep to it whatsoever. Although I bought frozen cubed sweet potatoes and pre-cut onions and peppers, which left me with only having to cut the chicken. Either way, this recipe is definitely one of the simpler ones that I have tried. I also loved that there were peppers, green beans, sweet potato, and cauliflower rice with this meal. ALL the colors and nutrients! I had to almost quadruple the ingredients below to get enough meals for our house, so I also increased the cooking time in the Instant Pot to around 30 minutes. This was definitely over kill and my sweet potatoes paid the price, unfortunately. Just pointing this out in case you enjoy eating those chunks of potatoes instead of it getting cooked into the sauce. I would also suggest removing the potatoes and chicken while you saute the sauce at the end. Paired with some cauliflower rice and topped with raw cashews and this meal was a hit all week long. Let me know if you give it a try! 

Sweet Potato Chicken Curry (​Instant Pot or Slow Cooker)
Ingredients:
  • 2 tsp. ghee or coconut oil
  • 1/2 medium yellow onion, diced
  • 3 garlic cloves, minced
  • 1 ½ lbs. chicken breast, cubed
  • 1 medium-large sweet potato, cubed (~2 cups)
  • 1 red pepper, sliced or diced
  • 2/3 cup chicken broth
  • 3 Tbsp. curry powder
  • 1 tsp. cumin
  • 1 tsp. ground turmeric
  • ½ tsp. cayenne
  • 1/2 tsp. sea salt
  • 1 can (14 oz.) full fat coconut milk
  • 2 cups frozen green beans
  • Cashews, cilantro & cauliflower rice for serving
Directions:
For Instant Pot
  1. Set your Instant pot to the saute setting. Add the ghee, onion, and garlic and saute until onions are translucent.
  2. Then turn to manual setting and set temp to high. Add the chicken, sweet potatoes, red pepper, broth, curry, cumin, turmeric, cayenne and sea salt. Seal the instant pot and set time for 12 minutes.
  3. Once time is up, release the pressure by switching from seal to vent. Once pressure is released, remove lid and turn Instant Pot to saute setting. Stir in the coconut milk and frozen green beans and let cook for an additional 2-3 minute or until the green beans are heated through.
  4. Meanwhile, saute cauliflower rice in a skillet on medium heat with 1-2 tsp. of ghee. Saute until warm and cooked through. Length of time to saute cauliflower rice will depend on if it is in a fresh or frozen state.
  5. Serve over cauliflower rice and top with cashews and fresh cilantro.
For Slow Cooker:
  1. In a slow cooker, add the sautéed onions and garlic, chicken, sweet potatoes, red pepper, green beans, chicken broth (1¼ cups), spices, salt, and pepper. Cook on high for 3-4 hours. Add coconut milk and cook on low for an additional 30-60 minutes or until hot.
Notes:
For a thicker curry – mix together 2 Tbsp. of water with 1 Tbsp. tapioca starch. While instant pot is on the saute setting, stir into curry after the coconut milk is heated through and let set for a few minutes to thicken.

Original recipe found here
0 Comments

Instant Pot Cilantro Lime Chicken

3/30/2020

0 Comments

 
Picture
Another great Instant Pot recipe to add to the collection. What I enjoyed most about this recipe was that it tasted nothing like other cilantro lime chicken meals that I've made before. There was not a huge cilantro or lime bite whatsoever, but a delicious subtle hint of flavors that paired well with the Cilantro Lime Cauliflower Rice. I ended up tripling the recipe below and using significantly less olive oil and ghee, but other then that made the recipe as. My only note was there was a ton of sauce to thicken up at the end, so I did throw in some arrowroot powder to help thicken it up faster. Since I did this with the chicken in the pot still, my nice chicken thighs turned into a shredded chicken real quick. I don't mind this at all, but if you want the full thigh in your meal, definitely don't throw them back in the pot until you are done thickening the sauce up and the saute mode is off. I lied, one more note is for the coconut cream all you need to purchase is a can of full fat coconut milk. You can use the thick condensed part at the top of the can for the coconut cream. A little easier and cheaper then using a can of coconut cream. Overall, we really enjoyed eating this meal all week long!​

Instant Pot Cilantro Lime Chicken
Ingredients:
  • 6-8 boneless chicken thighs skinless or with skin*
  • sea salt and pepper to taste
  • 1/2 teaspoon garlic powder
  • 1/2 teaspoon cumin
  • 1/8 teaspoon chili powder or to taste
  • 2 Tablespoons olive oil
  • 2-3 Tablespoons ghee
  • 1/2 small onion chopped
  • 4 garlic cloves sliced or minced
  • Juice of 1 lime
  • zest of half a lime
  • 1/3 cup finely chopped cilantro
  • 1 teaspoon Italian seasoning
  • 1/3 cup homemade or low sodium chicken broth **
  • 2 Tablespoons coconut cream
  • Chopped fresh parsley and lime slices for garnish if desired

Directions:
  1. Season the chicken with salt, pepper, garlic powder, cumin and chili powder.
To cook in the Instant Pot:
  1. Press the Sauté function (Normal setting) on the Instant Pot and add the olive oil to the pot. 
  2. Place chicken in the Instant Pot and cook on each side for 2-3 minutes, or until golden brown. This helps to seal in the juices and keep it tender. (You may have to work in batches depending on the size and amount of chicken you are using). Once browned, remove from Instant Pot and set aside.
  3. Melt ghee in Instant Pot and stir in the onions and garlic. Add lime juice to deglaze pan and cook for 1 minute. Add Italian seasoning, lime zest, cilantro and chicken broth.
  4. Place the chicken back into the Instant Pot, lock the lid, and turn the valve to SEALING.
  5. Select the Manual (older models) or Pressure Cook (newer models) button and adjust the timer to 7 minutes.
  6. It will take about 5-10 minutes to come to pressure and start counting down.
  7. When done, release the pressure after 2 minutes, then remove your Instant Pot lid.
  8. Remove chicken from Instant Pot using tongs and set aside on a large serving plate. Stir in coconut cream into the Instant Pot. If you like your sauce thicker - you can thicken with arrowroot starch slurry by mixing 1 teaspoon arrowroot starch mixed with 1 teaspoon cold water. Press off and turn Instant Pot to SAUTE function. Cook and allow the sauce to bubble and thicken. Turn off and add chicken back to the Instant Pot to coat with sauce. Spoon sauce over chicken and sprinkle with chopped parsley. Serve with your favorite sides and garnish with lime slices, if desired.
To cook on the stove:
  1. In a medium-sized skillet over medium-high heat add olive and cook for 4-5 on each side, or until chicken reaches 165 degrees. Transfer browned chicken to plate and set aside.
  2. Return pan back to heat and melt ghee. Stir in onion and garlic. Add lime juice to deglaze the pan and cook for 1 minute. Add Italian seasoning, lime zest, cilantro and chicken broth. Stir in coconut cream [If you like your sauce thicker - you can thicken with arrowroot starch slurry by mixing 1 teaspoon arrowroot starch mixed with 1 teaspoon cold water.
  3. Once the sauce has bubbled and thickened up slightly, add the chicken back into the pan until hot. Spoon sauce over chicken and sprinkle with chopped parsley. Serve with your favorite sides and garnish with lime slices, if desired.
Notes:
*For chicken breasts: use 3 breasts, sliced horizontally in half.
**I use ⅓ cup of broth combined with the juice from the lemon in a 6 Quart Instant Pot DUO with no problems or *burning sign - if needed you can increase the amount of liquid if this combination doesn't work for your Instant Pot model

Original recipe found here
0 Comments

Instant Pot Pina Colada Chicken

12/9/2019

0 Comments

 
Picture
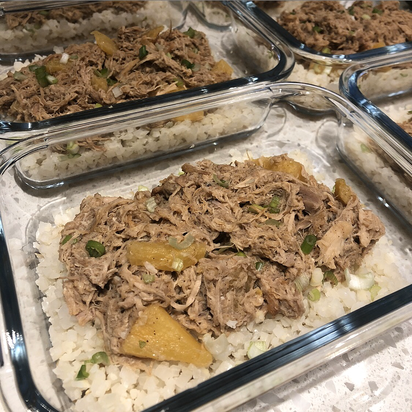
This chicken turned out super flavorful and unlike any pineapple chicken recipe that I've tried before! I ended up tripling most of the ingredients below, with the exception of using 2 tsp cinnamon and just one can of full-fat coconut milk. Check out the note on the coconut cream below, but basically you can just use the thick part from a can of full-fat coconut milk, or dump the whole can in if you want. No need to let that ingredient stop you from giving this one a try. This recipe was extremely hands-off after cutting the pineapple and throwing everything into the Instant Pot. When it was done cooking, there was plenty of extra sauce. I followed the recipe below and added a Tbsp of arrowroot starch mixed with a Tbsp of water, and set the Instant pot to saute mode to help thicken up the sauce some. You can also just put the pot on Saute mode without adding the arrowroot starch, and continuously stir until the sauce reduces. The arrowroot starch just speeds the process up slightly. I also really enjoyed the green onions topped on this meal, so don't skip out on that if you can! With plenty of flavor and sauce, this paired perfectly with plain frozen cauliflower rice, which made for the easiest meal prep. Definitely a recipe that I will be throwing into the meal prep rotation going forward! 
​
Instant Pot Pina Colada Chicken
Ingredients:
  • 2 pounds chicken thighs
  • 1 cup fresh or frozen pineapple chunks
  • 1/2 cup full fat coconut cream (see note to make your own)
  • 1 teaspoon cinnamon
  • 1/8 teaspoon salt
  • 2 tablespoons coconut aminos
  • 1/2 cup chopped green onion (garnish)
Directions:
  1. Place all ingredients, except green onions, into Instant Pot. Close lid. Press Poultry button.
  2. Pot will automatically set itself for 15 minutes, high pressure.
  3. Once cooking has stopped, turn off Instant Pot. Let pressure release naturally for 10 minutes.
  4. Carefully open lid and remove from pot and stir.
  5. If you’d like to thicken the sauce a bit, simply stir in a tablespoon of arrowroot starch mixed with a tablespoon of water. Then, press the Saute button. Cook until sauce thickens to your liking.
  6. Turn off Instant Pot and serve with green onion garnish
Notes:
To make your own coconut cream, simply place a can of full fat coconut milk in the fridge overnight. When ready to use, open can from bottom and drain out coconut water ( you can drink it or discard it). You will be left with pure coconut cream in the can.

Original recipe found here
0 Comments

Chinese Sweet and Sour Chicken

11/25/2019

0 Comments

 
Picture
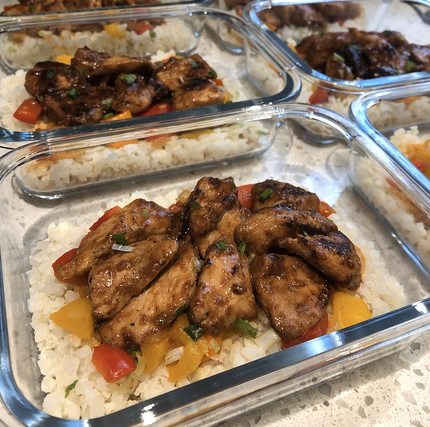
I know I write that all of my meals are delicious, but this one turned out like overly the top I could eat it everyday for weeks delicious! Seriously, this meal was so freaking good. This Asian-inspired Paleo blog is 3/3 with the recipes that I've tried. Although I am not sure if I'd put this one in the category of easy bulk meal prep recipes, but if you have some time to heat up a few batches of chicken in the wok or large skillet, this one is 100% worth trying out. On another note, I also had to quintuple the recipe below to get enough meals, so most people probably won't need to do that. Back to the recipe though... I pre-cut the stir-fry ingredients and marinated the chicken the day before cooking to help ease the meal prep Sunday load. Definitely make sure you thinly slice the chicken breast! While the chicken was cooking, I threw the sweet and sour sauce into the blender and heated up some plain frozen cauliflower rice in the microwave. There was SO much sauce at the end to throw over top of each meal that the plain cauliflower rice had plenty of flavoring once all put together. I personally did not use white pepper, but black pepper instead, and opted for the apple cider vinegar over the rice vinegar. As far the oils, I do recommend sticking to the sesame oil for the chicken marinade, but you can easily swap avocado oil for something like coconut oil instead when heating up the chicken. Basically, don't be discouraged by the ingredient list and make it work if you can, because this meal turned out tasting absolutely amazing! 

Chinese Sweet and Sour Chicken 
Ingredients:
Sweet and Sour Chicken:
  • 1 1/4 lbs Chicken breasts or thighs, , skinless boneless
  • 1 1/4 tsp Coarse sea salt
  • 1 1/2 tbsp Coconut Aminos
  • 1/4 tsp White pepper
  • 1/2 tsp Ground ginger powder
  • 1 tbsp Toasted sesame oil
  • 2 tsp Arrowroot starch 
Stir-Fry:
  • 3 tbsp Avocado oil
  • Quarter one whole Yellow onion, diced
  • 1 bulb Scallion, chopped
  • 2-3 slice ginger, roughly chopped
  • Half one whole green bell pepper, cut into bite size cubes
  • Half one whole red bell pepper, cut into bite size cubes
Sweet and sour chicken sauce:
  • 1/4 cup Dry apricots, or figs, or pitted prunes
  • 1/3 cup Pineapple juice, fresh or from a can, not in heavy syrup
  • 2 tbsp Coconut aminos
  • 1 1/2 tbsp Rice vinegar, ,or 2 tsp apple cider vinegar
  • 1 1/2 tsp Tomato paste
  • 1 small Pinch of sea salt
  • 3-4 tbsp Chicken stock or water 
Directions:
Season the chicken:
  1. Thinly slice the chicken breasts or dice the chicken thighs. Mix well in a medium bowl with the remaining chicken ingredients. Marinate in the refrigerator while preparing the stir-fry ingredients.
Sauce:
  1. Blend dry apricots with pineapple juice, coconut aminos, rice or cider vinegar, tomato paste, and a little salt. Puree with chicken stock or water to thin the texture.
Stir-Fry:
  1. Preheat a wok or large skillet over medium heat until it's too hot to place your palm nearby, about 2-3 inches away. Add 1.5 tbsp of the avocado oil. Add the chicken in the skillet in one shallow layer and pan fry until golden brown, about 2-3 minutes, flipping once to cook the other side for an additional 1 minute. Set aside along with the chicken juice.
  2. Heat the remaining 1.5 tbsp of oil over medium-high heat in the same skillet, then lower the heat to medium. Add the onion, scallion, and ginger. Season with a small pinch of salt. Stir-fry for 5 to 10 seconds. Add the bell peppers. Season with another small pinch of salt and stir-fry for 5 to 10 seconds. Add the chicken back to the skillet. Add 3 to 4 heaping tablespoons of the sweet-and-sour sauce. Keep stir-frying until the chicken is completely cooked through. Serve hot and immediately.

Original recipe found here
0 Comments

​Slow Cooker Butter Chicken over Cauliflower Rice

10/14/2019

0 Comments

 
Picture
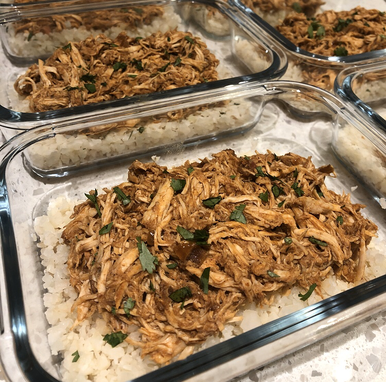
After hearing from a couple of good friends that this recipe is their favorite, I'm bringing this one back from when I last posted it in 2016. However, for some reason my sauce looks way darker then it did the last time I made it. The only difference this time around was I used my trusty Instant Pot to saute and slow cook in instead of a crock pot, and I left out the Arrowroot Flour. Which now that I write this out, I am sure that Arrowroot Flour would have lightened up the sauce color for sure. I am getting side tracked though. This meal still turned out delicious! I recommend using a can of full fat coconut milk for the most flavor. Garam Masala and Arrowroot Flour are the only ingredients that you may not have in your pantry already. Garam Masala is just a spice that you can find at most grocery stores. You can even search my site for recipes that use the spice to make sure you put it to good use! The Arrowroot Flour is just a thickening agent, which you can totally omit or swap for another thickening agent if you want. I skipped using it this time since the saute mode on the Instant Pot helps reduce/thicken the sauce up. I love these saucey recipes because I can easily heat up or microwave frozen plain cauliflower rice to pair with this, and be done with meal prep. Super easy, super quick, and super delicious! ​

​Slow Cooker Butter Chicken
Ingredients:
  • 1 Tbsp Organic Coconut Oil
  • 3 - 4 whole Garlic, crushed
  • 1 whole Onion, diced
  • 1 3/4 cup Coconut Milk
  • 3/4 cup Tomato Paste
  • 2 Tbsp Arrowroot Flour
  • 2 tsp Garam Masala
  • 1 tsp Curry Powder
  • 1/2 tsp ground Ginger
  • 1/2 tsp Chili Powder, Add more if you like it hotter
  • 1 pinch Sea Salt
  • 1 pinch Black Pepper
  • 2 1/5 lb Skinless Chicken Breast

Directions:
  1. Heat coconut oil in a large saucepan on medium high heat
  2. Add onion and garlic, cook, stirring frequently for approximately 3 minutes or until the onions have become translucent.
  3. Add coconut milk, tomato paste, arrowroot flour, garam masala, curry powder, ginger powder, and chili powder, stirring until well combined and the sauce has started to thicken. Season with salt and pepper.
  4. Add chicken to the slow cooker, then add the sauce and mix through the chicken
  5. Cover and cook on low heat for 5 hours. Cover and cook on low heat for 5 hours.
  6. Serve with coriander and your favorite side.

Original recipe found here
0 Comments
<<Previous
    Picture

    Erika Copeland

    Sharing the recipes I prepare to help others eat more nutritious food and begin their journey to a healthier life.

    Instagram

    categories

    All
    AIP
    Beef
    Breakfast
    Brussels
    Burgers
    Casserole
    Cauliflower Rice
    Chicken
    Crockpot
    Kombucha
    Low FODMAP
    Meal Prep Tips
    Nutrition Blog
    Pork
    Pressure Cooker
    Quiche
    Sausage
    Shrimp
    Snacks
    Steak
    Sweet Potatoes
    Treats
    Tuna
    Turkey
    Vegan
    Video
    Whole30

    Archives

    December 2021
    November 2021
    September 2021
    August 2021
    July 2021
    June 2021
    May 2021
    April 2021
    March 2021
    February 2021
    January 2021
    December 2020
    November 2020
    September 2020
    August 2020
    July 2020
    June 2020
    May 2020
    April 2020
    March 2020
    February 2020
    January 2020
    December 2019
    November 2019
    October 2019
    September 2019
    August 2019
    July 2019
    June 2019
    May 2019
    April 2019
    March 2019
    February 2019
    January 2019
    December 2018
    November 2018
    October 2018
    September 2018
    August 2018
    July 2018
    June 2018
    May 2018
    April 2018
    March 2018
    February 2018
    January 2018
    December 2017
    November 2017
    October 2017
    September 2017
    August 2017
    July 2017
    June 2017
    May 2017
    April 2017
    March 2017
    February 2017
    January 2017
    December 2016
    November 2016
    October 2016
    September 2016
    August 2016
    July 2016
    June 2016
    May 2016
    April 2016
    March 2016
    February 2016
    January 2016

Powered by Create your own unique website with customizable templates.
  • Home
  • All Recipes
  • Goal
  • About
  • FAQ
  • Contact